Tuesday, 6 March 2012

Basic Bushcraft Kit And How To Get Started

When I first got interested in Bushcraft, my initial questions were... "What should be my basic bushcraft kit and how do I get started ?"

In this post, I hope to give you and bit of an idea, how I got started and what kit you want to consider, to get yourself up and running.

I must point out though, you can have all the kit in the world, but if you don't have the knowledge to back it up, you're not going to get very far. And when I say knowledge, that doesn't mean you have to be an expert before you go out into the wilderness. You just need tutorials or basic instructions, that you can refer to, that will allow you to go out into your local woodland and practice your skills.

You can then build on these skills, improving them as you get more experienced. And over time you will arm yourself with an arsenal of knowledge that will stay with you wherever you may find yourself and whatever situation you are faced with.

Marry this with some reliable equipment and you're good to go, ready for whatever is thrown at you. But the main thing is, have some fun. Enjoy the learning process and be proud of yourself when you learn a new skill.

And when you do start to go into the outdoors, make it an enjoyable experience. Have the appropriate kit for the conditions and terrain. There is nothing worse than trying to light a fire in the rain with a box of cheap matches, just to make a brew. Be prepared (Yes I was a Boy Scout)

Ok, so where should you start...

Well a good place to start is with some reference material. If you have never put up a basha (tarp shelter), made a fire or chopped wood, you need to know how to go about it. So you need some form of reference.

This can be in the form of written instructions from a book, or something I found usefull when I first started, a video tutorial. We're not all the same and some people learn better from books whereas other people, like myself, much prefer to watch a video. So you use whatever reference material suits you best.

Books... And What To Consider...

If you want to chose a suitable book to get started, look no further than Ray Mears Outdoor Survival Handbook.

This is a fantastic book for beginners and more experienced bushcrafters, as it covers all four seasons in seperate sections. This means you are not overloaded with information, you just concentrate on what is around you at that particular time of year.
If you are looking to spend just a day, a week or even months in the outdoors, this book guides you, with great illustrations and simple to follow instructions.
It takes you through all the basics, such as shelter building, firelighting, woodcraft and first aid.
This is a great book to start with and will serve you well, as you increase your bushcraft knowledge.

This is not the smallest of books and if you are struggling for space or just want something you can carry in your pocket, when you're out and about, then consider the SAS Survival Guide by John 'Lofty' Wiseman.
Speak to any bushcrafter or outdoorsman (or woman) and they will no doubt have the pocket version of this book either in their pocket or in their rucksack. John 'Lofty' Wiseman is a legend in the world of survival, so you can rest assured that this little book is full of quality information and great to keep with you when you are on the trail.
It covers virtually every aspect of survival you could possibly think of, so if you are ever out in the wilderness (or your local woodland, to be more realistic). And lets say for example you need to know how to filter some stream water to make a safe and drinkable cup of tea, just refer to this fantastic little book and you will no doubt find your answer.

There are many other books on the market, which you should also look at, but to get you started, you can't go wrong with these two books.

Another way of learning new skills is to go on a survival/bushcraft course, where you are actually shown what to do and you can see exactly how things are done. However, these courses, although extremeley good, can be very expensive. So what's the alternative... ?

Video Tutorials...

Video tutorials are a great (and cheap) way to learn new bushcraft skills. You can watch other people trying out the skills that you may want to also learn more about. You can see their mistakes, their methods and listen to advice they may have to offer.

You can see what kit they use, what they recommend or reviews they have done on kit that you may be looking to purchase. All valuable information, just from the click of your mouse.

As you will no doubt be aware, Youtube is a fantastic source of information (It's not just for cats that can juggle or drunk people falling off tables). And I can say from experience that there is a core group of people on Youtube, that regularly submit videos to their respective channels (This is how I first started and eventually began to create my own videos and so evolved my own channel, JesterBushcraft), providing great information, kit reviews, advice and tutorials.


The great thing about these videos, is that if you forget an element of the skill, you can always go back and re-play the video, just to remind yourself. You can save all your favourite videos into a specific folder, depending on what skills you are working on.

And probably one of the most popular uses of Youtube channel videos, is for kit reviews. If you are looking to buy a new piece of kit and you want to know how good it is or what other people think of it, watch a video of somebody who has already purchased it and used it.


Ok,so we've bought a couple of books and we've watched a few videos, just to get us in the mood and possibly find a couple of new skills to start practicing.

One of the next things I would recommend, is to either get yourself a map of your local area or go onto Google Maps and print out a map of where you live.

Get To Know Your Location...

When you are starting out, you don't want to be driving hundreds of miles to a remote location that you know very little about, with possibly the wrong kit for that particular environment.

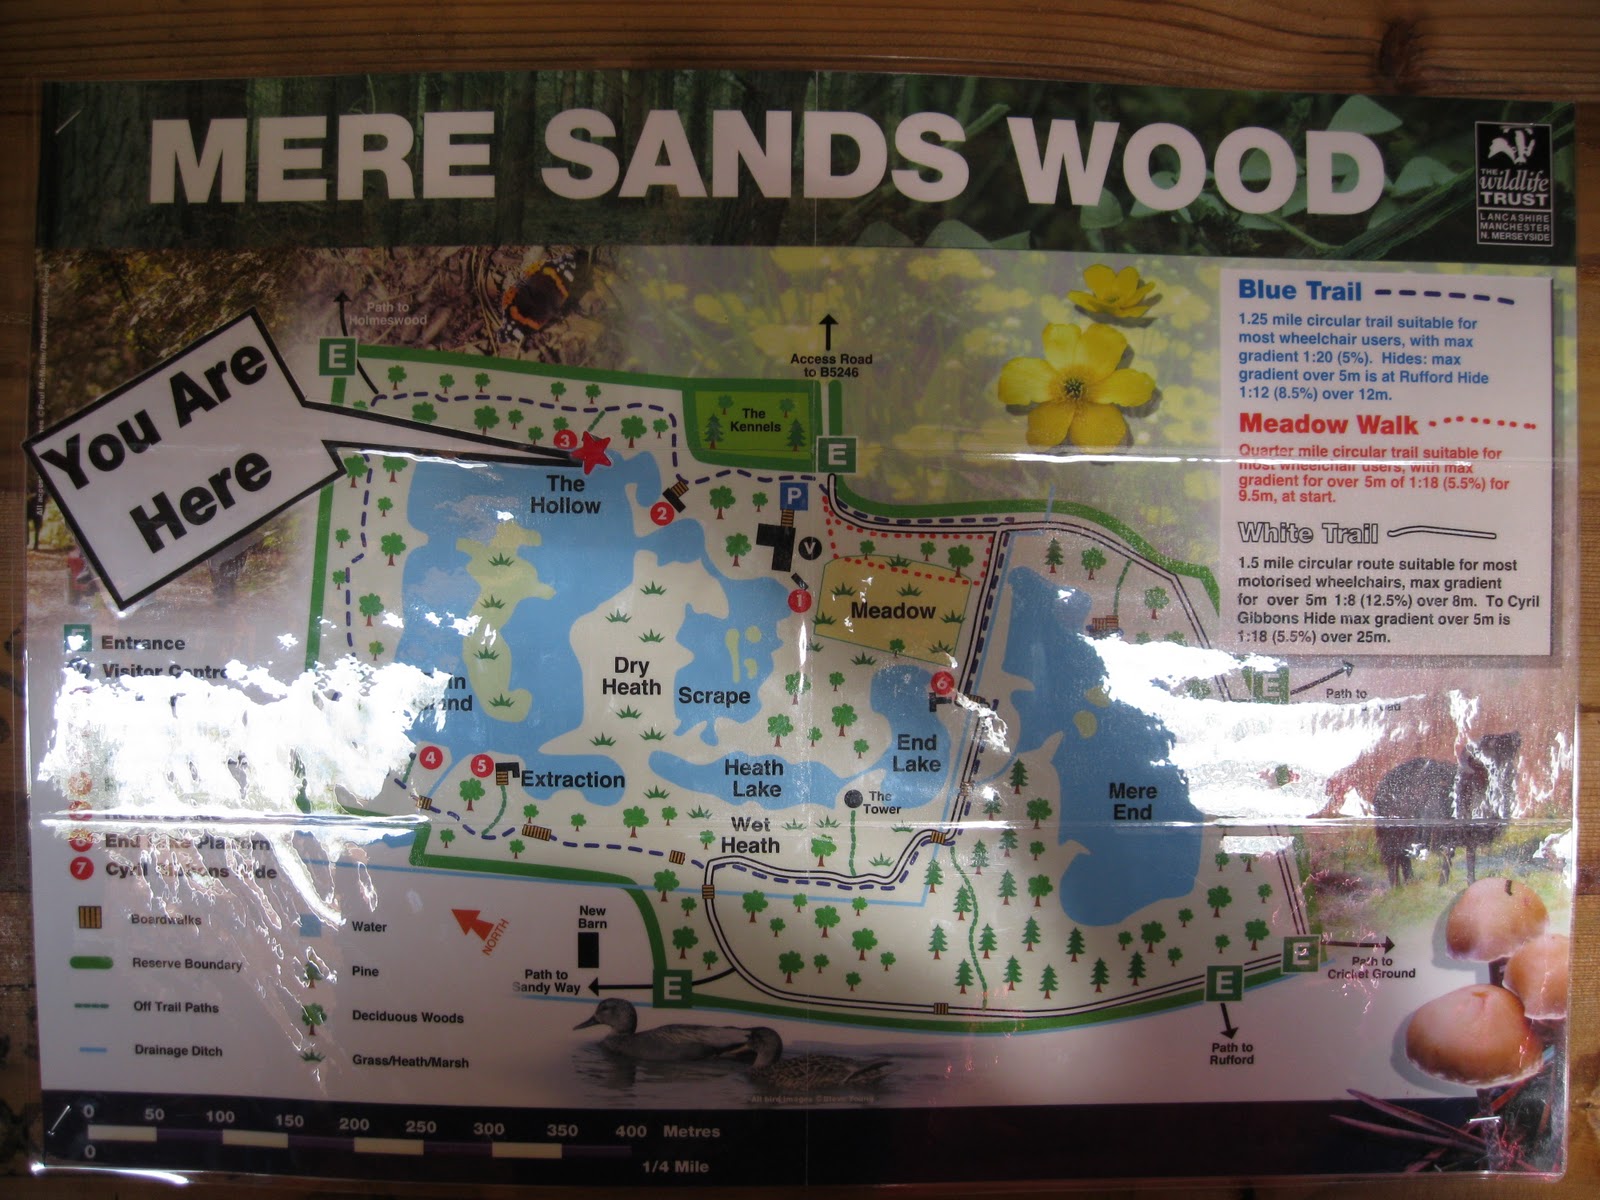
What I like to do, is simply print out a map of the area that I am going to spend my bushcraft time in and keep it in a plastic map case or simple clear plastic folder type pocket (See photo). Or you can produce your own "Minimal Maps"
Having a visual view of your surrounding area, will show you potential spots to explore. You will be surprised what small areas of woodland are reasonably close by, that you can use to practice your skills. Do make sure that the areas you want to explore are not private land.

I have spent several hours/days visiting different areas of woodland near to where I live, just looking for the perfect place to took myself away and practice my skills. Somehwere that I know I can get to within half an hours walk or a few minutes drive.

So, we know what skills we would like to try first and we have an idea of where we are going to go to try these new skills. Now we need some kit... The exciting bit !

Basic Bushcraft Kit... What Do I Need ?

The kit you take with you is all down to the area you are going into, what you intend to do when you get there and the situation you may find yourself in (intended or not).

And also, personal choice. A lot of people favour certain types or brands of kit and that's fine. It's your kit, so you take what you are comfortable using. None of this information is the law, its just a guide.

Well, no matter how much or how little kit you end up with, you are going to need something to carry it all in. So first on the list is a rucksac or pack of some kind. It doesn't need to be a huge 100 litre pack and it doesn't need to cost a fortune.

Rucksack or Pack

If you are just going out for a few hours a small 10 litre (Grab Bag) pack is fine. If you intend to be out for a full day, you may want to consider a larger pack (approx 20-30 litres) which will give you enough space to pack all your essentials.

At this point, I am going to assume you are wearing the appropriate clothing and footwear for the terrain and conditions you are expected to find in the location you are heading for.

The second thing on my list would be a form of shelter, to protect you from the elements. this can be as cheap or expensive as you like. Basically you just need a tarp (sometimes called a basha) of some kind and a means of support, usually a length of paracord and some guylines.

Shelter

If you want to go down the budget route, simply get a cheap 2m square groundsheet, that will cost you a couple of (£) pound. Try to get one that comes with some form of attachment point in the corners (brass eyelets).

Or you could spend a little bit more (£5 - £20) and treat yourself to an ex-army surplus basha, which is just a sheet of waterproof material, approximately a 2.5m square with brass eyelets and webbing fixing points to enable you to string it up in various configurations, using whatever you may have with you or around you.

Ex-army surplus gear is a great way to build up your kit, as you know it is going to serve you well and be of good quality. And if you search around, you get can some good bargains.


You will also need a length of strong string, cord or even better paracord (about 10m should be plenty) to use as a ridge line to hang your basha from. Add some guylines to each corner and you're good to go.

I have listed a couple of basha configuration examples below, that you could use to setup your own shelter...
Ok, so we've got a rucksack or pack, a form of shelter like a basha or cheap groundsheet, some paracord to form a ridgeline and some guylines to create our shelter.

We're under the shelter, keeping dry from the rain and its time for a drink and something to eat.

Food & Water

You are always going to need water, so we need a means of carrying your water. At first a simple drinks bottle that you recently consumed is sufficient. Just rinse it out and fill it up with water. A litre size bottle is going to be just fine, the more robust the better. Eventually you can get a purpose made water bottle, relatively cheaply, like the ones issued to the army or similar.

If you are getting your water from the tap at home, then you can assume it is safe to drink. But if not you are going to need to make sure it is safe. Now I could ramble on in more detail about making your drinking water safe, but for now we are just going to assume the water is debris free and just needs to be boiled.

And to boil your water, you are of course going to need a means of heating your water up. Not only that, if you want a warm meal, which you will if you're out in slightly cooler conditions, you will need some form of stove or cooking system.

Again, the type of stove you chose is dependant on how long you expect to be out for and how many people you are catering for. But for the purposes of getting started, we are going to assume its for yourself and potentially another person.

There are many forms of heating up your food and water, from meths/alcohol, gas canisters and natural materials. But for sheer simplicity I would recommend a form of meths/alcohol burner style stove.

These are easy to use, relatively light and compact and not much can go wrong with them. I recently purchased a Trangia Triangle, which is basically a form of wind shield, with a wire framework that houses a standard Trangia burner. It packs down very small and is lightweight, which makes it ideal for day trips or just a few hours in the woods.


Twinned with a form of billy can to contain your water, will allow you to get a rolling boil within 5-6 mins, ready for a hot cup of coffee or soup... Mmmmmmmm !

You can of course use the same setup for other meals, like noodles, porridge or beans etc.
You will of course need a means of lighting the fuel, so a simple box of matches, disposable lighter or what most bushcrafters carry, a firesteel, which will never let you down (even in wet conditions), snap or run out of fuel.
I have prepared a video demonstration of the Trangia Triangle and billy can, So FEEL FREE TO WATCH IT HERE

So we know where we are going, we have a means of shelter should the conditions worsen. we have a means of heating up water for a hot drink and meal. And once we have prepared our meal, we can sit down and learn more about bushcraft and survival from one of our chosen reference books.

In addition to these items, I would suggest also carrying the following :
  • A first aid kit
  • A good pocket knife
  • Camera or notebook
Everybody should carry some form of first aid kit, whether it be for an hours walk or a days hike (or overnight camp). And the kit should be tailored to the type of outing you are embarking on. Always keep your first aid kit in the same pocket or place in your rucksack. This way, you will always know where to go for it in an emergencey. And make sure it is somewhere easily accessible.

When you are starting out in bushcraft, you don't need a huge bladed knife, for hacking your way through the undergrowth. You just need a good, reliable pocket knife that maybe has a reasonable sized main blade, a small saw and possibly a can opener. Thats it, you don't need much more. If the knife also has scissors, tweezers etc. great, you never know when they may be required.

But for now, you just need a knife that will allow you to prepare some guyline pegs, cut some rope or string, carry out small cutting jobs etc.


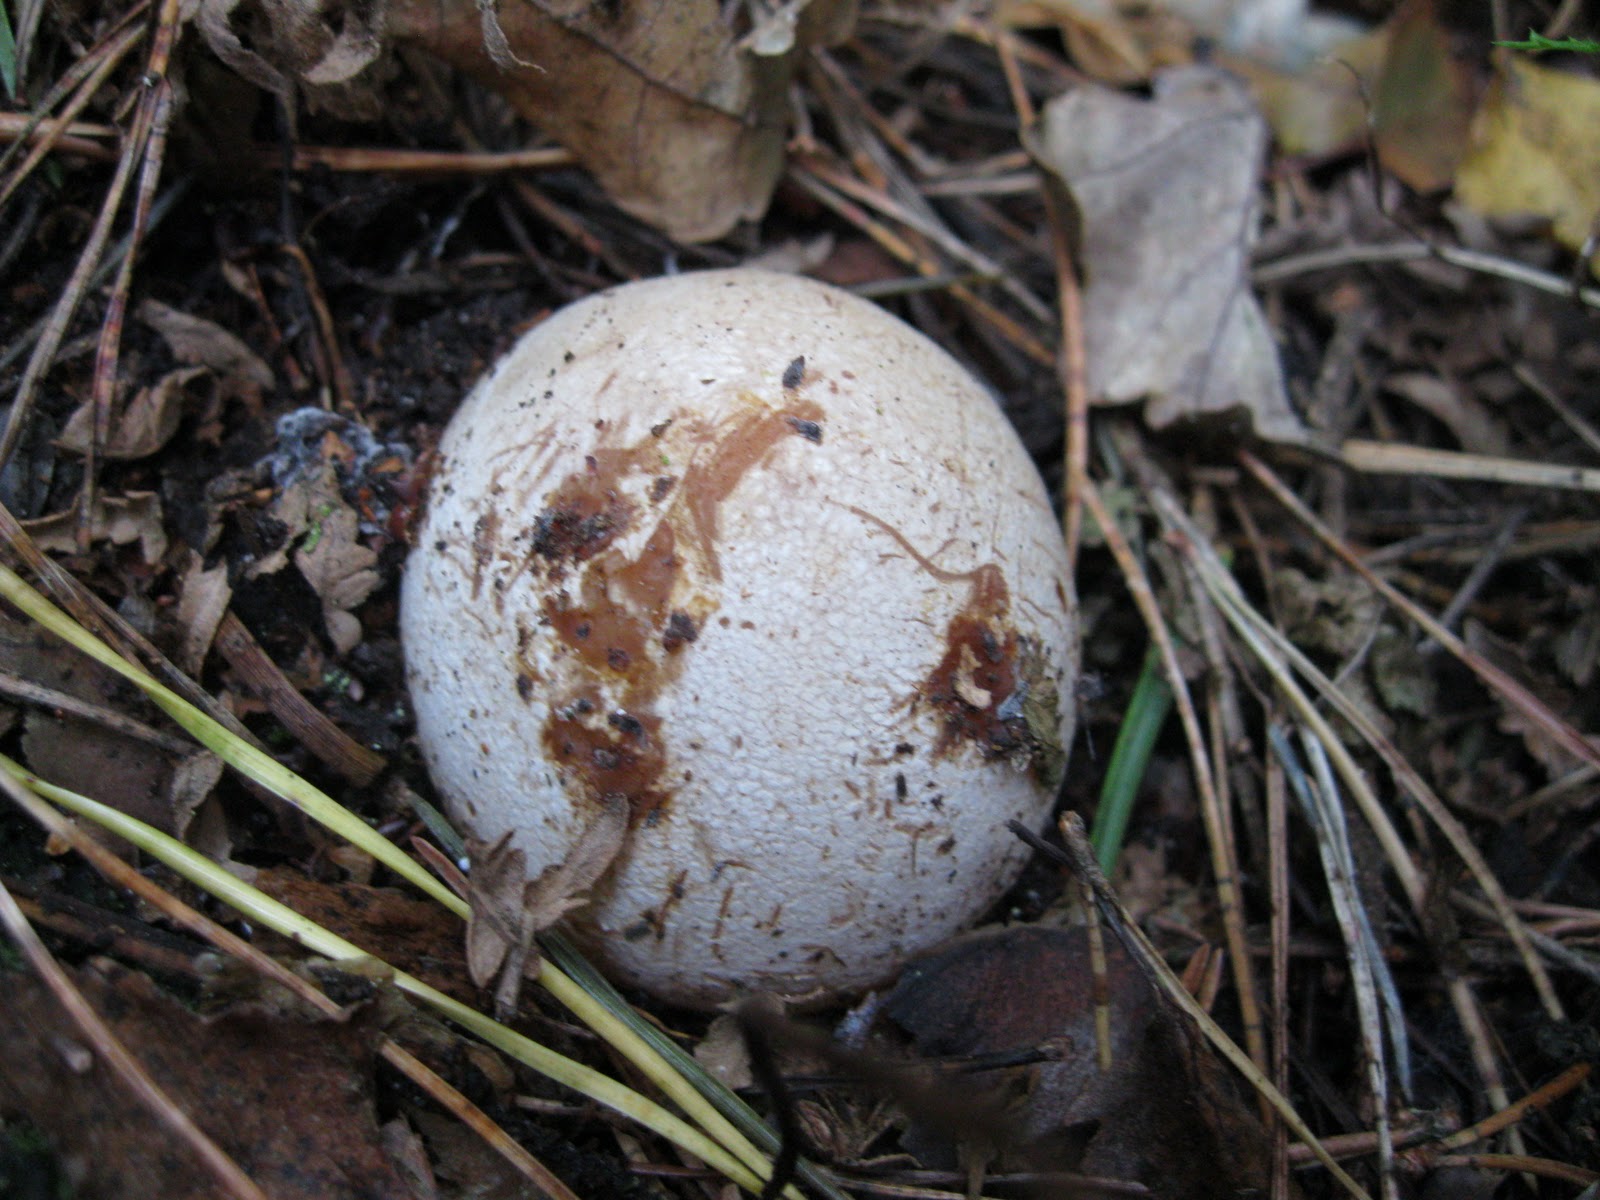
And although, not an essential piece of kit, I think recording your progress (Maybe on your own Youtube channel) or what you have found when out in the woodland, is a great way to learn your craft and build up your knowledge of the great outdoors.

And so for that I always carry a small camera (Plus a tripod... one of those pocket bendy ones is great) and a notebook and pencil). This way, if I spot a species of fungi I don't recognise, I can simply snap a photo and look it up when I get home.

So there we are, I think you are ready to get out there and start exploring your surroundings. But as I said earlier, it's all about enjoying your time in the woodland.

So be prepared, be safe and enjoy yourself !

Tuesday, 3 January 2012

Future Posts For 2012 - Tracking, Fungi & Photography

Firstly I would just like to wish everyone a Happy New Year and thank you for taking time to visit my blog (And my Youtube Channel - JesterBushcraft).

I started my Youtube channel back in August last year (2011) and have now almost reached 200 subscribers which is amazing. I also started this blog to accompany the channel and hopefully act as a diary of events for my own reference really.

At the tail end of last year I moved house, so I didn't upload as many videos as I would have liked. And the same goes for posts on this blog. But with it being new year and a time for new resolutions, I hope to increase the amount of content on both mediums.

This year I plan to finally do my first overnight wild camp, something I have been building up to for some months, much to the (polite) annoyance of some of my subscribers... "When you going to do your first overnighter Mick ?"

I would also like to build on my new found knowledge and interest of fungi, where I will be venturing into my local woodland to find new species and check up on existing ones too. I will be improving my photography skills too, as I have acquired a slightly better camera. Rather than just snapping as I wander, I will try to spend a little more time and effort to capture a much clearer image, which hopefully will help me (Or one of my readers) to identify the fungi I stumble across.

Having received a Ray Mears book for my birthday, I will also be learning a new skill, which I have wanted to try for quite some years... Animal tracking. A Youtube friend of mine has pre-warned me about the difficulties involved in animal tracking, but also the fun aspect and how it can improve your awareness of the woodland around you. All things I am keen to learn more about and build upon. So I am really looking forward to getting out into the woods to see what I can spot or even track !

As I travel down by "Bushcrafting" road, I am finding myself steering more towards the wildlife aspect of being outdoors, rather than learning how to make cordage or build shelters. BUT... these skills will still be with me on my outings and I will always be learning new skills as I go.

I hope you will continue to follow me on my journey as I pick up new skills, discover new aspects of wildlife and post or upload new content to my blog and Youtube channel.


Thank you for your interest and support

Sunday, 23 October 2011

Fungi Foray With Dr Irene Ridge - NW Fungi Group

Yesterday I attended the Fungi Foray with Dr Irene Ridge from the North West Fungi Group, which was hosted at Mere Sands Wood in Ormskirk, Lancashire.


Approximately 12 attendees congregated in the visitors centre, chit chatting about the reserve itself and our reasons for attending the foray. At around 2pm Dr Irene Ridge arrived, introduced herself, then off we went into the glorious sunshine and the nearby woodland.

We had only walked a couple yards into the woodland and the identification began. We were encouraged to wander about ourselves, searching for any fungi. Once a specimen was located, the rest of the group would gather round, whilst Irene identified the fungi and explained a little more about its characteristics and possible uses.

Soon after the first fungi was found, we were all foraging around in the leaf litter trying to find the next specimen. Turns out, having only walked a couple of yards, we spent a good 20 mins in this same area, turning up new fungi to be identified.


It was great to watch Dr Irene, going through her sequence of tests to positively identify the differing fungi. And was equally surprising to watch her taste some of the fungi in an attempt to confirm her theories. You have to know exactly what you're doing in these cases and Dr Irene sure knew her stuff.

We eventually wandered back onto the path and further into the woodland, in search of more fungi. I had been at the same reserve a week previous and knew of some good specimens to identify. One of which I suggested to Dr Irene to visit. Having given her the name of the fungi "Shaggy Inkcap", she commented that they were short lived, but I ran on ahead to check it was still there. Only to return, saying "Yes, you're quite right...short lived", as the fungi was now nowhere to be seen.

This in itself was a lesson learned, that fungi sometimes only have short lifespans, so if you do find a fungi specimen, take a photo of it for future reference and cataloging.

On we pressed, picking out smaller and more camouflaged fungi as we got familiar with the more common species. As I mentioned earlier, I had been here a week ago and had obviously missed a great deal of fungi that were hiding in the undergrowth. But I was know really getting into it and was eager to locate more and more fungi. I was like a kid in a... well, a woodland FULL of fungi.


As one of the younger members of the foray, I was able to spot some of the less obvious specimens (See photo above, left)

One particular fungi we located was a common stinkhorn (Phallus impudicus) and believe me, you certainly smell this particular fungi before you spot it. I had smelt this odour before when out walking in woodland, but never realised it was a type of fungi or even the stinkhorn. I suppose the name gives you a bit of a clue. The Latin name also made me snigger a little, but I suppose it's one you're not going to forget.

I was also amazed to learn that the stinkhorn can form from the egg stage (See photo left) to the fully grown fungi (Above)within a matter of hours. You could potentially watch this fungi grow before your very eyes, something I hope to witness at some point in the future. The stinkhorn we found was in its latter stages and had started to fall apart, but you could still see the lattice framework of the stem and the remains of the cap.

Other specimens we were lucky enough to find were Beef Steak Fungus, Birch Polypore, Deceiver, A Coral Type Fungus, Candle Snuff and many more that I can't remember the names of.

There was so much information, Latin names and common names to remember. But these are all things I can study over time, referring to photos and notes I have taken, building up my knowledge slowly but to a point where I can positively identify the fungi.

Before attending the foray, I had said to myself that if I came away with one new snippet of new knowledge, it had been worthwhile. Well I came away with much more than that and can now positively identify 3 or 4 new specimens of fungi, that I couldn't before. I am also more confident handling the fungi, knowing what characteristics to look for and where to look for them.

The foray actually over-ran, by about quarter of an hour due to the number of fungi we found, but Dr Irene was happy to continue identifying the specimens as we unearthed them.

Finally back at the visitor centre, I said my thank you's to Dr Irene and returned home, content with what I had learned and am now looking forward to going out in my local woodland to continue with my study of fungi.

I recommend anyone with a vague interest in fungi or just wildlife in general to attend an event such as this, as they are fun to go on, gets you out in the fresh air and you also learn some useful stuff too.

Whilst in the Mere Sands Wood Visitor Centre I picked up a leaflet on a website called iSpot.org.uk which is all about sharing your wildlife observations. Whether it be fungi and lichens, plants, fish, invertebrates, birds, mammals or amphibians and reptiles.

You can basically upload images of any aspects of wildlife to this site which is run by The Open University adding any info you may have, such as location, characteristics etc. and there are other like minded people on the site that can help you identify your findings.

It is a great reference site for anybody interested in wildlife in general and well worth a visit.

Monday, 17 October 2011

Fungi Foray With Dr Irene Ridge (NW Fungus Group) At Mere Sands Wood

On Saturday 22nd October, this is where I will be... The Fungi Foray With Dr Irene Ridge (NW Fungus Group) At Mere Sands Wood.

I hope to learn a lot more about some of the fungi I was lucky enough to come across this weekend, when out for a family walk.


Once I have attended the guided walk, through Mere Sands Wood, I will be posting another article of my new found skills and findings.

Learning About Fungi (Fungus) - My Learning Curve Begins

As today is chucking it down with rain, it seems the perfect time to start my steep learning curve, discovering about fungi (fungus) identification.


I have only just started getting interested in fungi and think it is a great addition to any bushcrafters skill set. I have been taking advice from a fellow outdoors man, called Peter on Youtube, who has been giving me some guidance on how to get started in fungi identification.

He doesn't claim to be an expert, but he does have a good knowledge of the subject, has been on several courses regarding fungi (One of which was the Ray Mears Woodlore course) and if I had to trust anybody, it would be him.

Anyway, he has basically advised me to learn about 2-3 different species and to learn them well. It is much better (and safer) to know a few species in depth and to be able to identify them with 100% certainty. Rather than know a little bit about 20-30 species.

It only takes, the little bit you DON'T know about just one of those 20-30 species, to be serious or even fatal.

So, the learning starts here and over time I will add more photos and information to any future posts I publish.

With regards to any photos on my "Fungi" posts, they will all have been taken myself. I won't be using stock photos from other sites or books. I think this is important, as it just makes the learning process more enjoyable and hopefully should stick in my head better.

At present the only reference book I have is a Collins Nature Guide - Mushrooms And Toadstools of Britain & Europe by Edmund Garnweidner


And so to my first species, Fly Agaric.

I have chosen this one for a number of reasons. Firstly it is a poisonous variety and I feel it is more important to be aware of the fungi that will cause you harm, rather than ones that are edible.

Amanita Muscaria (Fly Agaric)

The cap is initially spherical and completely enveloped by a white, warty veil which later on in life becomes convex, flat and sometimes bowl-shaped with a grooved margin (outermost edge of the cap) in its latter stages.

The cap can be bright orange-red to scarlet, with a lemon-yellow colouring below the skin of the cap (Pellicle). The cap can grow up to 15cm in diameter.

The gills, which is the grooved underside of the cap are white and classed as crowded, meaning they are grouped very close together.

The spores of the Fly Agaric are found to be white. To identify spores from fungi, you would need to use a microscope with x1000 magnification. This is an aspect I haven't yet explored.

The stem thick all the way down, white in colour, with a broad, hanging and comb-like grooved ring. The base of the stem is bulbous with warty residues of veil (temporary structure of tissue found on the fruiting bodies)

If you were to cut into the cap, the flesh would be white and have no scent.

The Fly Agaric, tends to be found in coniferous forests, like pine plantations for example. They are often found in pairs or groups, but is not uncommon to find as single specimens, as I found recently on a walk at Mere Sands Wood, near Ormskirk.


This particular fungi contains small amounts of Muscarin (Natural product found in certain fungi) but also contains Muscimol (The major psychoactive alkaloid present in many mushrooms of the Amanita genus) which is harmful.

The Fly Agaric also contains poisons that have not yet been analysed and can prove fatal if digested.


Other specimens that resemble the Fly Agaric are Amanita Regalis, which is also poisonous. I have yet to locate this fungi and photograph for my records.

If you would like to watch a short video of my walk through Mere Sands Wood and the vast number of fungi that we came across (including the Fly Agaric), please follow the link below :


This post on the Fly Agaric is an ongoing article and will be updated with more information and pictures of the fungus, as I acquire them, so please keep returning to see any updates.

I would appreciate and welcome any comments on this particular species or any other fungi types, as the more information I have the quicker I am going to learn. Thank You

Sunday, 16 October 2011

A Family Day Out In Mere Sands Wood - Finding Fungi

Spent an afternoon in Mere Sands Wood today with my family, searching for fungi along the way.

The weather was relatively nice in Lancashire today, so it was suggested that we get out and grab some fresh air. So, it was wellies on and off to a local nature reserve.

Mere Sands Wood is a fantastic little nature reserve, tucked away amongst the agricultural fields of the area and is looked after by The Wildlife Trust.


The reserve consists of lakes, woodland and grasslands and has been thoughtfully designed to accommodate a wide range of abilities. There is a voluntary fee of £2.00 for parking/visiting the reserve, but is well worth the money and the funds are put to good use as you will see when you walk round this amazing reserve.

You have a choice of 3 routes, which are clearly marked using different coloured posts and can also be clearly seen on the maps available from the visitor center.

There is an abundance of wildlife, birds, plants and of course fungi, which is what I was looking for today. And with the help of my 2 young kids aged 4 and 7, it wasn't long before we found our first specimen.

I had already warned my kids of the dangers of fungi and made sure they didn't touch anything they found, when running off ahead of us. I think its great to get kids involved in the outdoors at an early age and they soon pick things up (not literally) and understand the dangers.

We have been lucky enough to visit this reserve on numerous occasions and have seen Tawny Owls and Kingfishers on previous visits. But today was fungi day and I was keen to build on my ever expanding database of species.

Recently I was speaking to a Youtube acquaintance of mine who has just returned from a Ray Mears Woodlore course, where he learned a great deal about fungi. And the best piece of advice he could give me, was to go out and study 3 species of fungi, until you were 100% sure you could identify them.

So that is exactly what I plan to do. I am going to spend the next 6 months or so, searching for just 3 species of fungi in my local woodlands and nature reserves, until I can positively identify, know the names of, their uses, characteristics and different stages throughout the year.

I will also take loads of photos of these species as they change form and colour and take masses of notes until I know them in my sleep. Once I am satisfied I can do this, I will then add another 3 species and repeat the process, slowly building up my knowledge.

This way I will have a more certain knowledge of a few species, rather than a little knowledge of 100's of species (The latter being more of a danger to myself and others).

And so, with camera in hand and 2 eager children, we set off along the paths searching for fungi. And it wasn't long before we started to build up a huge list of different species.

We were also lucky enough to meet a fellow fungi enthusiast who made us aware of a Fly Agaric and its location. And what a specimen it was, soon found by my little boy, who we had now named "Fungi Finder"

Several photos later and a lovely walk through the reserve, we called in at the visitors center where I noticed a poster for a guided fungi walk, next Saturday. So I put my name down straight away, as this would be a great opportunity to get to know the different fungi in more detail.

All in all we had a great afternoon, the kids learned more about what fungi were and I increased my fungi database considerably.

You can see the full gallery of photos I took HERE. I now look forward to next Saturdays guided fungi walk.

Friday, 14 October 2011

Finally The Rain Stops... Time For A Walk To Buzzard Wood

After several days of terrential rain, yesterday it finally stopped, the sun came out and I seized the moment and went for a walk to my favourite local bushcrafting spot, Buzzard Wood.

I really enjoy going for my local walks, as it serves many purposes. Firstly I am getting fresh air and exercise, which as we all know is good for you, so I'm onto a winner before I even start.

Secondly I get to know my surroundings better and over time become more familiar with whats around me. Things such as edible fruits, tinder sources, potential camping spots etc.

When you are out on a walk I think it is important not to just put your head down and march from one point to another. You should take your time, look around you and try to find new plants, fungi or wildlife that you come across in the hedgerow.

Take good quality photos, to enable you to look back at them when you get home. Try to identify them and discover if they have any edible properties, medicinal uses or other uses, such as firelighting.

Build up a database of your findings, categorising them into plants, fungi, trees, birds, insects etc. Doing this will help you learn as you go and it WILL stick in your head, ready for the next time you are out.


Depending on how far you are walking, you can brush up on your navigating skills. You don't have to have a gps, map, compass etc. Just a simple printout of the area you are walking in, kept in a protective wallet, in case it rains.

And so, I set off on my walk, with a full 35 litre Karrimor rucksack, as I intended to shoot several videos of my newly acquired Trangia Triangle and 12cm Zebra Billy Can, which I was eager to test out in the field.

Due to the recent heavy rain, the ground was very wet and I was glad for my British Army Canvas Gaiters, which have served me well since I bought them. As always, I was on the lookout for different plants, fruits and fungi and I wasn't let down, as they were plentiful.

I came across Hawthorn Berries, Sloes, Crab Apples, Blackberries and several different species of fungi. Not to mention the abundance of wildlife, such as Wrens, Jays, Pheasant, Cormorants, Tawny Owl, various butterflies and of course squirrels.

Having walked just over an hour, I reached my destination, Buzzard Wood. This isn't its real name, its just a name I christened it when I first discovered it a few months ago. This was a simple idea I picked up from a Youtube friend, who names all his woods that he visits. Mainly to conceal the location identity, as when you find a nice secluded spot, you like to keep it for yourself,even though other people think exactly the same when they are there too.

Once in Buzzard wood, I setup a simple base camp using my British Army Basha and some camo netting, just so that I blended into the woodland. I unpacked by rucksack and made a start with some new videos for my Youtube channel (JesterBushcraft).

Today, I was filming a field test of my new Trangia Triangle and 12cm Zebra Billy Can. And I have to say it worked brilliantly. Easy to setup, simple to use, sturdy and packs away into a very compact drawstring bag.

The Zebra Billy Can was also a success and I managed to cook myself some noodles with vegetable soup and of course a brew to wash it all down.


I always like to shoot as many videos as I can when I'm out, as I never know when I'll next get the chance. I think its important to keep my regular (And loyal) subscribers updated with new videos. They have taken time to visit my channel and leave quality comments and feedback. So I think its only fair I respond with more info, reviews and tutorials.

So, in addition I did videos on my Victorinox Trailmaster, A New Kitchen Kit and Map Ideas.

After a couple of hours in Buzzard Wood and a close encounter with a Tawny owl, I packed up my camp. Made sure I had left no trace of being there and set off back home.

By this time the sun was out and it was getting quite warm, so I rolled up my sleeves and plodded on across the fields and woodland, taking more photos of more different species of fungi etc.

I arrived back at my car ,having done a 5.17 mile round trip and was quite pleased with my days work.

I think it does you good to have "YOU TIME" away from the rat race, collect your thoughts and enjoy what you have around you and sometimes, closer to you than you think (Tawny Owl, virtually on my shoulder)