Friday, 15 March 2013

eGear Survival Essentials - Outdoor Survival Kit From Whitby&Co

Earlier this year I was kindly sent an assortment of outdoor gadgets, gizmos and kit items, by Outdoor Accessory Distributor Whitby And Co. The first of which was the Nite-Ize CamJam Cord Tighteners, that I reviewed in January.

And so we move onto the second item, that came in my box of goodies, The eGear Survival Essentials Ready Kit 200.

Whitby&Co are based in Kendal, Cumbria. Which is known as the gateway to the Lake District and is just a short drive up the M6 Motorway for me. They are suppliers to a wide range of markets and industries, from outdoor and camping, hunting and fishing, gift, DIY and agricultural.
Any sensible outdoors person, who likes to enjoy pursuits such as Bushcraft, Climbing, Backpacking, Camping etc. is likely to have a first aid kit, somewhere on their person or in a rucksack. Its just common sense !

But how many of us are prepared for other such emergencies, that may not require first aid or medical attention.

You may have gone out for a days hike in the hills, only to realise that you have left your coat in the car and it is starting to rain.

You may have accidentally dropped your compass and smashed it on some rocks.

Or on a more serious note, you may have injured your ankle, when falling down a small ravine. You are unable to walk and you may now find yourself having to spend longer than you expected in challenging circumstances.

Do you have the necessary items with you to be able to last for long periods of time, in these conditions ?

This is where the Outdoor Survival Kit from eGear Survival Essentials, could be a great asset to your kit bag. Hopefully, you will never need to ever open the kit up, but if the circumstances ever arise, you know that your chances of survival or coping with challenging scenarios, will have increased.

The pouch itself and all its contents (That are supplied as part of the Ready Kit 200) weigh just 502g and measures approx 18cm x 5cm.

The durable pouch is brightly colored orange, so you're not likely to miss it and also has a reflective side, which could be used for signaling. The pouch also comes with a small carabiner to enable you to attach it to a loop on your rucksack.

But personally I would just leave the kit somewhere in the bottom of my rucksack. On the inside cover of the pouch is an area to write any personal details, such as contact details, emergency contacts (next of kin), medical conditions, medication and allergies etc. all useful information, should you ever be found by the rescue services.
The Ready Kit 200 includes a varied selection of items, which are listed below. But you could always add (or remove) any items you think may enhance the kit, more to your specific requirements :
  • 125ml of emergency drinking water
  • 2 emergency food ration bars
  • Ultra lightweight poncho
  • Foil survival blanket
  • Green light stick
  • Survival towel
  • Signalling mirror
  • Button compass
  • Whistle
  • Tea light candle
  • Magnesium block, ferro rod and striker
  • Pocket survival guide
All in all a nice selection of items, that would cater for most of your basic survival requirements.

  • Water
  • Food
  • Protection
  • Navigation
  • Rescue
Two of the items in the kit that caught my eye were the emergency drinking water and the pocket survival guide. All of the other items, you would expect to see in such a kit. But the sealed pack of emergency drinking water, is something I have never come across before and I thought it was a nice item to include.

The same goes for the pocket survival guide. This highlights some great survival points and lists them in a straight forward but highly informative way. The small 6 page (double sided) guide covers:

  • Food & Water - Treating, Consumer Guidelines etc.
  • Trails & Travel - Hazards, Best Practices etc.
  • S.T.O.P - Stop, Think, Orientate, Plan
  • HIS/HERS - Hazard, Injury, shelter, Heat, Energy, Rescue
  • Survival Chant - To keep spirits up
  • Shelter - Basic guidelines
  • Fire - Fire lighting basics
  • Signals - Different signal methods
  • First Aid - Hypothermia & Heat exhaustion basics
  • Winter - Winter survival basics
This type of kit, doesn't just have to be for emergency situations. It may just be the fact you have left your lighter at home and have no means to ignite your camping stove.

What you decide to keep in your emergency Survival Kit, is personal preference, but as a starting point this handy little kit from eGear is as good as anything I have come across.

I am very thankful to Whitby&Co for sending me this kit to try out and it will now be a regular addition to my rucksack, whenever I venture out into the woods or hills. You never know what could happen when venturing into the outdoors.But if you have this type of kit in your bag, it could save your life or someone elses life.

Sunday, 3 March 2013

Trialing The Blogger App On A Morning Woodland Walk

On a gorgeous Sunday morning, myself and the kids decided to go for a walk through a small local woodland. And I thought it would be a great opportunity to post an article using just my iTouch and the Blogger app, to see how easy it is to use.

The woodland is just a stone's throw away from our house and so it wasn't long before the kids found the start of the footpath and a chance for the first photo.

This walk is renowned for being on the muddy side and the kids are always on the lookout for animal tracks. Being popular with dog walkers, it was no surprise that this was the first track to be identified.

The kids are slowly being "Programmed" to be on high alert for any fungi, when out on country walks. But due to the lack of species in these woods (and the time of year), we resorted to other things like catkins and gooseberry bushes.

We ventured on along the stream and into the meadow, where I have previously spotted fox scatt.

Back in the woods and close to a bridle way I spotted some different animal tracks, which initially I thought were deer prints. But the chance of deer in these woods are pretty slim. And on further inspection realised they were more likely to be from the sheep that graze in adjacent fields.

It was now time to head back home, collecting some firewood on the way back followed by the write up of this article using the Blogger app on my iTouch.

Before leaving the wood, my son was quick to spot a bear climbing a tree. But living in the UK didn't cause any concern for alarm.

And so, back home in my comfy armchair I sit writing this article using the onscreen keyboard of my iTouch, adding photos as I write. Not knowing if the photos will appear as I added them or in a bunch at the foot of the article.

I have no idea how this article will look when published to my blog and I have no intention of amending it, using the full Blogger software on my main computer.

The Blogger app would allow you to write articles on the go, taking photos from within the app and then saving as draft for editing at a later date.

But to enable you to see how the basic published article would look I have left it unedited.

Ok, so there we are... My first article using the Blogger app on my iTouch. If you have any experience using this app please leave a comment... Good or Bad.


Thursday, 21 February 2013

First Test & Review Of My Folding BBQ By Gelert

Having received a Gelert Foldable Barbeque - Silver for Christmas, I thought it was about time I blew the cobwebs off and gave it a maiden test.
On a cold afternoon in February, my 6 year old son and I ventured out into the garden with my new Gelert foldable bbq and a box full of sticks and wood offcuts. My son couldn't contain his excitement at the prospect of building a fire, so I set to work assembling this portable folding bbq.
My initial impressions, were that the setup of bbq was really easy and the seperate componenets fitted together relatively well. The overall quality of the product was also looking good. I would say that from opening the bag that keeps everything together, and setting the bbq up, it takes well under a minute (20-30 seconds with practice).
The bbq is constructed from stainless steel and folded down measures 31 x 4.5 x 20cm, the weight comes in at 1.8Kg and when folded down fits nicely into the sturdy carry bag, which also includes an instruction leaflet, showing you how to set the bbq up.

The Seperate Components Are As Follows :
(1) Folding Framework Stand
(2) Folding BBQ Side Walls
(3) Ash Plate
(4) Bottom Grate
(5) Grill
(6) Carry Bag & Instruction Leaflet

Once constructed, we then used tumble dryer fluff and silver birch bark along with a firesteel to get the fire started. With the tinder ignited, we continued building the fire using smaller twigs, followed by bundles of larger twigs. Due to the clever construction of the bbq walls and the raised lower grate, a good draught flow is produced, ensuring that the fire takes hold quickly and spreads throughout the fire wood material.

We soon had a substantial fire going, in the generously sized main pit and were able to sit the cooking grill in the top section of the bbq. This gives you ample cooking space to make a brew using a BCB Crusader Canteen Cup for example, leaving you plenty of room for billy cans, frying pans or simply placing sausages directly onto the grill.

The only problem I found at this point, was that with grill in place you were unable to add extra fuel to the fire. We got round this by turning the grill 45 degrees, sitting it on top of the bbq walls, rather than in the top portion of the walled section. Extra sticks could now be fed in at the corners quite easily. If you were using bbq brickettes you wouldnt have this problem as they are slow burning, but in a fire pit configuration you would need to make this alteration.
We continued to fuel the fire for a good hour and a half and to my surprise there was hardly any traces of ash being deposited through the bottom section of the bbq onto the ground. There is an ash plate that sits at the bottom of the walled section, under the lower grate and is only sat there, not secured in any way. And despite all the wood being thrown in and my son prodding it consistanlty throughout, little or no ash found its way through the bottom. This is great when using the bbq in woodland areas, where risk of fire could be an issue and you wouldn't have to worry about your LNT principles either, causing fire scares. This was a plus point in my eyes.

Having used the bbq for some considerable time, you would expect there to be some distortion in the sheet stainless steel walls, due to the heat. But this was not a problem and the structure held its shape very well.

Having brewed up successfully and exhausted our wood supplies, we let the fire die down, which left us with a few embers in the bottom of the grate. With a suitable stick I simply lifted the grate out, tipped the ash plate up and allowed the remaining embers (now extinguished) to drop to the floor. The whole structure was then left to cool down, before dismantling and folding up ready to go back in its carry bag.

For such a reasonably priced piece of kit (Approx £13.00) this cleverly designed folding barbeque scores highly for me and I will definitely be using this in my pack when going out on woodland walks with the family or just on my own. It makes a refreshing alternative to gas or meths stoves, especially if you know there are good sources of wood to fuel your fire.

Due to its small pack size, it would fit well into any rucksack you may be using and if you like to cook on an open fire, gives you the option to do so, but raised off the ground eliminating any damage to the ground.

I have used Gelert products before and they have always been a quality item at the cheaper end of the scale. And this folding portable bbq certainly ticks all the boxes.

I plan to do a full review of this Gelert Folding BBQ at a later date, when out in the field. For now please feel free to enjoy this video of its first setup and test. Also look out for some funny comments from my 6 year old son, who has a knack of coming out with some little gems. As you would expect from a little boy, it includes bogies... Enjoy !
If you have one of these portable folding barbeques, I would be interested to hear any comments or experieinces you have had with them, either as a fire pit for cooking in the woods or just as a portable bbq for in the garden, beach etc.

Tuesday, 29 January 2013

DIY Camera Tripod Modification For Macro Photography

When out capturing photos for my JesterBushcraft Youtube Channel and Blog, a good portion of those images are of fungi, wild flowers and insects. Which the majority of the time are taken low to the ground.

This usually entails, me led on the floor in the wet grass, trying to keep the camera as still as possible, whilst maintaining the required angle of shot.

Yes, it would be advantageous to use my tripod, but the one I have doesn't have the capability to take shots at low level to the ground.

Taking photos of subjects, such as fungi, from these types of angle can add to the look and feel of the image. So I think its worth the additional time and effort to make the photo look more interesting and appealing to the viewer.

Now there are of course tripods on the market that cater for this application of camera work, such as the Hama Traveller Compact Pro Tripod , but at present I am not in a position to spend any spare cash on a new tripod.

My current tripod, that I use most of the time, won't let me take shots low enough to the ground for what I need. But I do have an old tripod (See Image Right) that is quite short when completely collapsed down. But even this isn't quite at the level I would like to be for the required image.

Having looked at the mechanics of this old tripod, I noticed that the pivot points of each leg were governed by the moulded collar that housed the legs.

So with the Dremel Hobby 300 Series Tool in hand, spent no more than 20mins extending the pivot point channels. this allowed each leg to then open out that little bit further, until they were resting on the actual collar of the tripod.

Yes, I know what you're thinking...

it's not pretty, but nobody's going to see it and it functions just as I wanted it to.

This modification, was actually a lot easier and quicker than I thought to manufacture and the final outcome was great. With the legs extended out, the tripod sat very firmly and stable too, which is just what you want when taking macro images. Even with the weight of the camera, which in my case is a Fujifilm Finepix S9500, the tripod still stood firm, without any flex or strain on the leg pivot points.
With this low cost and simple modification, the overall height of the camera position has been considerably lowered, allowing me to now take the sort of pictures, I managed to capture opposite.
But without the hassle of lying on the ground, trying to hold the camera at the appropriate angle and with a steady hand.
I will now use this modified tripod, in conjunction with my newly purchased remote shutter release cable, to hopefully capture some great macro images. I would appreciate any comments on this article and welcome any feedback you may have.

Please also subscribe to keep updated with future posts. Thank You.

Monday, 28 January 2013

Are The Guy's At Handy Hammocks Listening To Their Customers ?

How many times have you purchased a product, then thought "This could be designed better" or "Why don't they do this to make it easier to use"

I think a lot of us have been in that situation before. But how many of you actually take it one step further and contact the company, to suggest design changes or ways to improve the overall functionallity of the product.

I dare say, some of you will have tried this at some point too, but I bet not many of you ever got a response from the company. Or better still, your ideas were actually acted upon and the product design was altered.

So what about the guy's at Handy Hammocks, brothers Jason and Mark Andrews. How have they responded to the feedback from their customers ?

Since the launch of their innovative self-supporting hammock, towards the back end of 2012, there has been much talk of the design and numerous comments about the concept. Understandbly there have been a few raised eyebrows amongst the traditional hammock campers, but also considerable praise and encouragement. Non more so, than from the author of The Ultimate Hang: An Illustrated Guide To Hammock Camping , Derek Hansen, who carried out his own test of the Handy Hammock, which can be seen on his blog article "Handy Hammock Stand Review".

As you will see from Derek's review, he modifies the current setup of the Handy Hammock with a few of his own ideas, to make life that little bit easier when setting up the hammock. These modifications are simple to install, but will make your Handy Hammock experience much more enjoyable.

And what about the guys at HandyHammock.co.uk, how have they responded to this feedback. Well, they have acknowledged that the modifications are beneficial to their design and have now begun encorporating these ideas into future hammock setups.

To me, this speaks volumes about the commitment and enthusiasm that both Jason and Mark have towards the success of the worlds lightest self supporting hammock system.

Having been one of the first people to review the Handy Hammock, I dealt quite a lot with Jason and Mark, bouncing ideas of them (Most of which they had already thought of).
But to their credit they took time to listen to my ideas and comments, responding with sincere words of thanks, whilst also asking opinions on certain aspects of their product, in an attempt to improve on their design. Behaviour that is just unheard of from many other companies.

Listening to their customers can only be an advantage, getting them ever closer to their goal, to grow their UK manufacturing base and establish a home and export market. A goal, which I have no doubt they will achieve in the near future.

The guys continue to come up with new ideas and concepts. Plus subtle alterations to their hammock designs, inspired by existing customers feedback and experiences. Which can only improve on the quality and innovative nature of this exciting new product range from Handy Hammock.

I for one am looking forward to seeing how this fantastic British design develops and would like to think I played a small part in whatever success, they richly deserve.

Thursday, 17 January 2013

BCB Crusader Cup - Putting A Lid On It

Many of you involved with bushcraft, camping or backpacking will be familiar with the BCB Crusader Cook Set. Which consists of a selection of components, like the cooker/windshield, water bottle, plastic cup, metal cup and lid, making up the entire cookset.

For those people who own a Crusader Cookset, you will no doubt have your own comments and reservations about the clear plastic lid that comes with the set. And in today's post I am going to discuss the various "lid" options that are available for the BCB metal cup, along with their individual pro's and con's.

Based on personal experience, I have broken down my findings into four different categories :

(1) Budget Lid
(2) DIY or Homemade Lid
(3) BCB Plastic Lid
(4) Heavy Duty Nato Crusader Cup Boil Cover

Each of these lid types, has it's place and have their own specific advantages or disadvantages, depending on application, budget or availability.

Using any of these lids in conjunction with your BCB Crusader Mug, will improve boil times, save fuel, keep your hot drink of choice warmer for longer, whilst also keeping debris and insects from taking an early bath in your hard earned brew.

(1) Budget Lid :

This, as the name suggests is the cheapest of the four options, is readily available in most households and is very easy to manufacture. We are of course talking about the Bushcrafters, Campers and Backpackers friend, tin foil or alluminium foil.

Not only is this stuff great for use as a lid on your BCB cup, but it can also be used for a multitude of other uses, like cooking for example.

But as a lid, it is both lightweight and efficient in reducing boil times. As well as keeping your drink warm afterwards. I used a tin foil lid for quite some time on a Pattern 44 army cup, before upgrading to a BCB metal cup.

Pros : Cheap & Lightweight
Cons : Disintigrate or degrade after prolonged use, Not very robust

(2) DIY or Homemade Lid :

If after using a tin foil lid, you would like to upgrade to something a little more substantial, you could always have a go at making your own lid out of some old offcuts of aluminium or similar sheet metals.

I was lucky enough to be sent a partly made lid from one of my Youtube subscribers, which I then finished off, by shaping and cutting to size, then adding a small wooden handle.

This worked brilliantly and I got some good use out of it.

Pros : Cheap & Robust
Cons : None Really, Other Than Having To Source Materials To Make It

(3) BCB Plastic Lid :

If you purchased the BCB Cookset, this plastic lid would have come as part of the kit. Or you may have purchased the lid seperately, to accompany your current BCB metal cup.

Either way, if you have used this lid, you will no doubt have your own opinions on its good or bad points. Many points have been raised about this lid, mostly regarding how useless it is when boiling your water in the cup.

Having done this for the first time myself, I came to a similar conclusion, as the lid began to melt during boil time almost welding itself to the rim of the metal cup.

But on reflection, I think this particular design of lid is for keeping your drink warm afterwards, whilst allowing you to drink the contents of your metal cup, with the lid still in place. A little bit like the coffee cups you get from the well known outlets.

And for this reason, the BCB Crusader Cup Lid serves its purpose.

Pros : Lightweight, Robust & Custom Fit. Contents Can Be Consumed With Lid In Situ
Cons : Not Suitable For Use During Boiling Process, Prone To Melting or Cracking

(4) Heavy Duty Nato Crusader Cup Boil Cover :

Without doubt, the best custom fit lid for the metal BCB Crusader Cup is the Heavy Duty Nato Crusader Cup Boil Cover, available from Ray Mears Bushcraft.

This quality made, durable and multi purpose lid is a great addition to your BCB Crusader Cup and cookset and will give you a lifetime of use.

And with the addition of the strainer, it will assist in additional cooking capabilities, like straining pine needles or nettles when making tea etc. Plus the highly polished underside which could be used for signalling or even shaving.

Pros : Very Durable (Will last a lifetime), Built In Strainer, Polished Underside For Signalling (or shaving)
Cons : Price (although, you are only ever going to buy one of these)

Watch Demo's Of These Lids In Use Out In The Field :

Tin or Alluminium Foil Lid
DIY or Homemade Lid
BCB Plastic Lid

Friday, 11 January 2013

Brownsea Island - Where Scout Camping All Started

Where Did Your Love For The Outdoors Begin ? For Me It All Started When I Joined Cub Scouts And I Was Taught How To Make An Open Fire, Then Cook Sausages Over The Glowing Embers. But Where Did Scouting All Start ?
Well One Contributing Location Has To Be Brownsea Island. And During A Family Holiday To Dorset In August 2012 I Was Lucky Enough To Follow In The Footsteps Of Sir Baden Powell And Walk Through The Same Woodland Where This Inspirational Pioneer Would Have Passed On His Passion For The Outdoors. I Hoped To Be Able To Do Just The Same With My Young Family And Here's How We Got On...
 

Brownsea Island can be found in Poole Harbour, which is located in the county of Dorset, United Kingdom. It is the largest of the islands in the harbour and can be accessed by the Brownsea Ferry. Which is exactly what my young family and I did whilst on a camping holiday in the county.
Robert Baden-Powell held his historical camp back in August 1907 for a group of 22 boys from different walks of life. And during the weeks expedition he would teach them activities such as camping, woodcraft, nature observation and of course chivalry. All of which we, as Bushcrafters or outdoorsmen seek an active interest in.
Having struggled to explain the importance of this island to my 5 and 7 year old kids and how my passion for bushcraft may never have happened if it hadn't been for a scouting camp held at this very location over 100 years ago, we decided to just grab our map and venture off into the reserve.

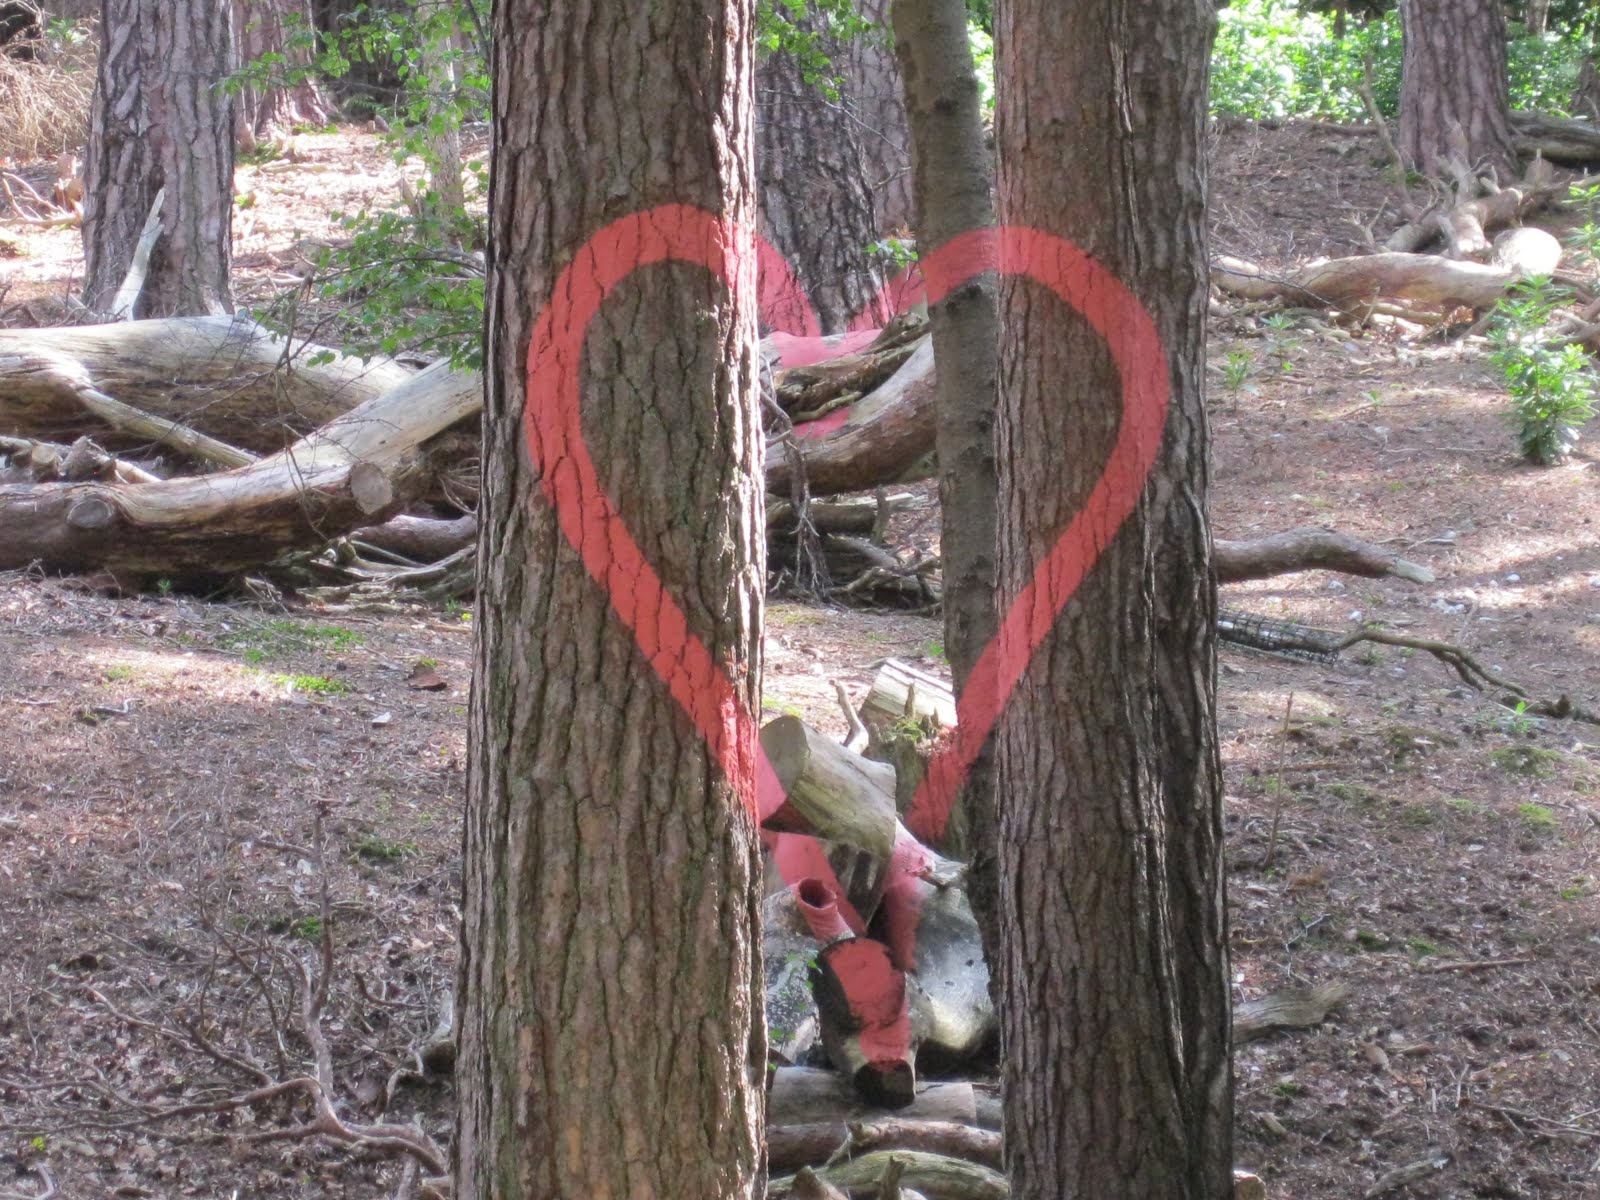
One of the amazing attributes of this beautiful island, is the fact the landscape and views you come across are constantly changing. One minute you are wandering along the small beach, paddling in the water. Then you climb up a shale path into the woods and you are surrounded by breathtaking forests teaming with wildlife. There are lakes and ponds, picturesque view points over the sea, huge lawned areas to play or sunbathe, then back into dense bracken searching for unusual tree art. The kids loved trying to find the painted lines on the trees, then standing in a certain place so that they would line up to create the images.

Of course there is also the actual site where the first of what was to be many scout camps, was held. Along with a small modern purpose built activity centre, where the many visiting Cubs, Scouts, Brownies and Guides of today can spend time learning new skills, as they did back in 1907.
It is just up from here that I found a memorial stone on a raised plateau, which commemorates this historical event. And just standing there looking out at the stunning view, I thought that they couldn't have picked a better spot. It was simply breathtaking and you could see why the great man chose this particular island.
Of great interest to me was the abundance of wildlife and fungi, which I took great delight in showing my 5 year old son, explaining the different insects and trees that were all around us. We have nick named our son The Great Fungi Finder, as he is so low to the ground and is constantly shouting "Dad, fungi". For a while I just thought he looked up to his Daddy as enjoyable to be around. But sadly it was just about the mushrooms !
Our time was nearly up on Brownsea Island, as the ferry was due to dock and take us on the return trip back to the mainland. So we headed off back through the woods as the sun shone through the trees. We had spent a good part of the day just wandering, paddling, sunbathing, exploring, observing the wildlife and simply enjoying our surroundings. I suppose that is exactly what those 22 young lads would have done everyday for a week, back in the August of 1907 and it would have changed their lives forever.
It was shortly after this trip in 1908 that Lord Baden-Powell published "Scouting For Boys" which was to be the beginnings of the Scouting movement and for many people back then, what we think of today as a survival handbook. Many books have been written since by the likes of Ray Mears and Lofty Wiseman and I'm sure that the skills and techniques they now write about are not too dissimilar to what Robert Baden-Powell detailed in Scouting for Boys: A Handbook for Instruction in Good Citizenship
If you are ever visiting this particular area of Dorset, I would strongly advise you to set some time aside to visit Brownsea Island, as it is a magical place that you and your family will always remember. Even if it is just to watch the cheeky red squirrels that are resident here.
Hopefully when my kids (who are now in Cubs) are my age, they will take their children and teach them about the great outdoors, the wonders of nature and the events that happened here all those years ago that have changed young peoples lives, all over the world, for generations.
Me being one of those people...

I have included this short video, which shows you what my family and I got up to whilst visiting Brownsea Island in August 2012 (Not 1907).

Like the clever tree art that appears, like magic, as heart shaped images on the tree's and the cheeky resident red squirrels that thrive here.