Friday 21 December 2012

How To Make 550 Paracord Bracelets Using A Single Length Of Cordage


So how do you make paracord bracelets out of a single length of 550 cord and why would you want to ?


Well, in my mind there are 2 reasons why you would need, or want to learn how to make a 550 cord bracelet. And be more inclined to use a single length of cord, rather than 2 separate pieces as shown in many video tutorials you can watch on Youtube.

Firstly, lets look at why you would need a 550 parachord bracelet...

As we all know, any bushcrafter worth his salt, will carry some form of paracord in his or her pack. The uses for paracord are endless and here are just a few for starters :

1. Tarp/Basha Ridgeline
2. Tarp/Basha Guy lines
3. Bow Drill Set (Bow String)
4. Securing Items To Rucksack
5. Securing Debris Shelter Framework
6. Repairs To Broken Straps, Bootlaces etc.

I could go on, but you get the idea and have no doubt already been shouting out other ideas (Please include them in any comments you may leave).

So lets imagine you have your paracord in your pack and you have used it to setup your tarp ridgline, along with some guy lines. But later on in the day your bootlace snaps or you decide to have a go at the bow drill...

"Damn It ! No More Paracord"

You can see where I'm going with this cant you... If you were wearing a bracelet with 550 paracord, problem solved. Simply remove your bracelet, untie the cord and away you go.

Wearing the bracelet has got you out of a sticky situation, which is what surviving is all about. Getting through challenging situations with what you have on you or can find around you.

In this example it was just to repair a bootlace or try your hand at the bow drill. But you never know when it could be used in a more serious situation. You may HAVE to create fire, to keep warm or cook a meal. You may HAVE to fashion some sort of splint on an injured person.

With this still in mind, it brings me onto why you should use a single length of paracord.

You have no idea when or for what you are going to need that paracord which is around your wrist. And likewise you have no idea what length of cord you are going to require to get you out of that sticky situation. So it makes sense to have the longest piece of paracord you can possibly have built into your bracelet.

If the bracelet is made up of 2 pieces, as is commonly demonstrated in a lot of video tutorials, you may find that your cord is just a couple of inches short for what you need to complete your task, which would be a great shame. And could potentially be the difference of creating a strong and rigid debris shelter or one that may collapse when you need it most.

I'm talking extremes here, but you see my point. Why have 2 shorter lengths of cord when you could have one long length which can be cut down to size, if required. The 550 paracord bracelet that I carry contains 2.5m of cord, which is a reasonable amount of cordage for a lot of tasks you may find yourself needing to carry out.

I generally keep the paracord complete, when making my bracelets i.e I leave all the inner strands intact, rather than removing them. Reason for this being, my bracelets are for practical use, not just to look nice.

If you want to make a bracelet, just to look good, by all means remove the inner strands, as it makes the bracelet more comfortable on your wrist.

There are also different buckle (or fastening) options. I use the contoured buckles, which are curved and shape to your wrist better. But the straight versions are fine and are more readily available. Some buckles even have a small emergency whistle built in, which is a great addition to have.

If you don't want to use a plastic buckle or cant get your hands on any, simply use a loop and knot method, which is equally as good as a means of fastening the bracelet to your wrist.

The stitch or weave used to create the bracelet is called the Cobra Stitch (Weave) and once learnt is really easy to do and you will be rattling these bracelets off in no time.

To create a more striking pattern, use 2 different colours of cord. Yes, I know this means using 2 lengths of cord, but this is aimed at the more fashion conscious bushcrafters... LOL

The Cobra Stitch is a really easy skill to learn and once mastered, allows you to create other projects that you may find usefull when bushcrafting or short of something to do on those rainy days.


These projects are great for kids too and I have already taught my 7 year old how to make key rings and bracelets for her friends at school.

If you would like to learn how to make a 550 paracord bracelet and how much cord you will require, feel free to watch my video tutorial below.


If you find the tutorial usefull, I would be interested to hear how you got on and maybe see some of your photos of your creations.

Monday 22 October 2012

Niteize Figure 9 Rope Tightener Review


Recently purchased a pair of Nite Ize Figure Nine rope tensioners, which I intended to use for setting up a no-knot ridge line system, in conjunction with my tarp or basha. This is my review...

"My name is Mick from JesterBushcraft and I am addicted to gadgets"... There, I've said it...

I must confess, ever since I saw James Bond for the first time, I have been a big fan of gadgets. And gadgets in the bushcraft/outdoor world are plentiful, some good and some not. So when I came across the Figure 9 Rope Tensioners from Nite Ize, I was interested to learn how they performed.

As they were only a couple of pound (£) each, I took the plunge and bought a pair from the well known online auction site. My idea would be to use one of the Figure nine's at either end of my 550 paracord ridgeline, making a no-knot system, rather than the Evenk knot/Taut line hitch combo.

When I received the package in the post, I was quite impressed to see how small the Figure 9's actually were. Measuring just 40mm x 30mm and weighing in at a meagre 3.5g each.


They were also well packaged with clear instructions on the inside of the packaging, giving you an example of 2 different ways you can use the Figure 9 (Loop System & Fixed End). You also get a little promotional leaflet, highlighting some of the other Nite Ize products in their range, like carabiners, torches and key chain accessories etc.

 
The Figure 9 is made of aluminium and the load limit is 50lbs (22.5Kg) and will accept cord/rope thickness of 2mm (1/16") to 5mm (3/16").

All the load limit and cord sizes are etched onto the Figure 9 itself so you will never forget the gadgets limitations. Plus there are simple step by step instructions on how to use it, on the reverse of the Figure 9. But to be honest, they are very straight forward to use, as you will see in my video later on in the post.


There are larger versions of this product, which will accept larger size rope, should you require it. And they also do a carabiner version, which is basically the same but with a carabiner style clip rather than the enclosed ring.


Rather than explain my experiences in text, you may be interested to watch the video below, which shows me demoing the Figure 9 out in the field along with my British army basha. I do mention in the video that this particular no-knot system would come into its own in the winter time, when we are more likely to be wearing big gloves or mittens, which make tieing knots more difficult.


I intend to use this system for my tarp/basha setup, whenever I go out into the woodland, from now on and am sure it will serve me well.

As a quick and easy rope tensioner, this is one gadget I will be keeping and hopefully using for some time.

Monday 15 October 2012

Handy Hammock - The Worlds Lightest Self Supporting Hammock Setup

Every Once In A While A New Product Appears On The Market That Makes You Think "Wow, That's Clever" And This Free Standing, Lightweight, Collapsible Hammock Ticks All The Boxes.

 
I was recently given the opportunity to field test and review a new portable hammock, that is completely self supporting and doesn't require the need for any tree's, which is ideal if you want to relax in comfort on a beach or in the garden.

British Design And Manufacturer...
The British company behind this ingenious hammock design is Handy Hammocks and have spent 20 years perfecting the idea of how to make a hammock stand up on its own two feet (literally !)

With hammock in hand, weighing in at just 1.53kg and all nicely contained in its drawstring bag, I set off for my local woodland hoping to learn how to set up a hammock with no trees.

I wanted to see how easily I could complete my hammock setup, straight from the bag. So I purposely refrained from checking the hammock components, prior to coming out. But I did allow myself a quick 5 minute look at the full colour instruction booklet.

So, once I had found my spot (clear of any tree's) I emptied the contents and started to follow the instructions. I have to say the instructions were a lot clearer the second time I completed the hammock set up, but were never the less fairly straight forward to follow.

Lightest Self Supporting Hammock In The World...
The first thing you notice about the hammock design, is the quality of the individual components. Like the ingenious hammock supports or struts which, in effect, form the hammock stand. These are made from aircraft grade zinc alloy, making this the lightest self supporting hammock in the world.

There is no guess work in setting up the Handy Hammock, thanks to the simple but clever idea of using base plates, connected with cord. Simply place the base plates on the ground with the cord stretched between the two and secure using the anchor pins.

  
Each high impact Nylon moulded anchor plate (Of which there are 4) are cleverly secured using 3 anchor pins, creating a strong fixing point for the four corner guy lines.

Then assemble the two struts, which is as quick and easy as putting up an umbrella. Insert the ends of the struts into the base plates and hang your hammock on the other ends.

Climb in and relax, free of any overhanging "widow maker" branches.

My initial setup, whilst referring to the instruction booklet and making the odd mistake, took me just under 20 minutes, straight from the bag.

However, on only my second attempt, I halved that time and set up in under 10 minutes.

Handy Hammock Details

Weight : 1.53Kg
Supports Up To 125Kg
Manufactured From Aircraft Grade Zinc Alloy With Kevlar Bracing Cords & 2.5 Dyneema Guy Lines.

When I first got into the Handy Hammock, I was to say the least, a little apprehensive, but climbing in and out of the hammock is the same as you would do with any normal setup. And I have to say was very comfortable, both in the sitting and horizontal position.

The hammock itself has good width to it, allowing you to position yourself on a diagonal for a more comfy lay.

Ideal For The Beach
This style of hammock design is perfect for using on the beach, but would require the addition of special beach anchor pins which are 600mm in length rather than the 300mm pins which come as standard with the hammock kits. This hammock would also work well in anybodies garden, where lack of suspension points are an issue.

This forward thinking hammock company are also planning to launch additional products, which will allow the "Handy Hammocker" to tailor their setup to whatever requirements they may have. Innovative add-ons such as a canopy system, heavier-duty hammocks, integrated sleeping bag, mosi-net, stowage system, extra guy sets (for marshland) and so on.

I know this particular form of hammock suspension is not going to be for everybody, as the hardened bushcrafter or backpacker likes to use the conventional setup using two trees to hang their traditional hammock from.

But I still feel that the Handy Hammock will have it's place in the market, especially for people on holiday who like to spend time on the beach or anybody who likes lounging about in the garden, as a more comfortable (and fun) alternative to the lounger or deckchair. Not only that, if you are a hill walker and want a novel way to chill out when you reach your destination, why not try the Handy Hammock. I guarantee you will have people queuing up to ask you about it, or even asking you to have a sit in it.

Hammock In A Bag...
The whole hammock setup, suspension, supports and all (hammock in a bag) are compact and light enough to be carried in a suitcase or rucksack, when traveling or walking in the hills. Which makes the Handy Hammock a great piece of kit for anybody wanting a fun and comfy way to relax when venturing outdoors.


If you have a decking area or balcony at your home, the anchor base plates can be permanently fixed using appropriate fixings, allowing you to setup your Handy Hammock in super quick time, whenever you feel the need to relax.

As I mentioned earlier, the Handy Hammock is relatively new to the market and the designers have big plans to improve on the design (if possible), the packaging and range of additional products. Making this a versatile, fun and quality hammock suspension system for young and old, serious outdoors people and those who just like to relax in style.

Learn More...

Please feel free to visit their website www.HandyHammock.co.uk where you can watch a fun (but informative) cartoon video, that explains the basic details of the hammock. You can also see my review of the handy hammock in the video below, which also includes a 40% discount code, valid until the end of October 2012... Don't Miss Out !


I really like my Handy Hammock and look forward to taking it on holiday with us or just relaxing in the garden, regardless of whether there is somewhere to hang a hammock !


Friday 21 September 2012

My DIY Tarp Setup No Knot Ridgeline System

Learn How To Make A Tarp Setup Using A DIY No Knot Ridgeline System


Anybody who has ever been wild camping and slept in a hammock or a bivi bag, may well have also used some form of tarp or basha to protect themselves from the elements.

This type of shelter, in it's simplest form is usually a ridgeline made of paracord, suspended between two trees on which a tarp or basha is hung to create an "A" frame type shelter, with the addition of two or more guy points.

There are endless ways to secure a ridgeline to your chosen tree's, but probably the most common method is to use an Evenk Knot (or hitch) at one end and a Taut Line Hitch at the other, which creates the tension on the ridgeline.

On a recent wild camp I was setting up my ridgeline in the rain and the light wasn't brilliant due to the dense tree cover, but continued to set up my ridgeline using the method mention above. I had no problems with the Evenk Knot, but when I cam to tie the Taut Line Hitch, for some reason, I was struggling to get the desired tension on the ridgeline.

I probably had three attempts to get the tension as I wanted it and actually ended up just wrapping the paracord around a lower branch and tieing it off there, as it was more convenient and I was getting soaked and needed the tarp up quickly.

Normally, this wouldn't be a problem, but on this occasion I struggled a little. Which got me thinking about an alternative tarp ridgeline system, that didn't require the need for any knots.

The more I looked into this, the more I began to realise that other people were not always comfortable with tieing knots or just preferred a no nonsense system that was quick and easy. Something you could maybe setup in the dark or in bad weather conditions (wearing gloves for example).

I then began to search for a solution and came across a range of products under the banner of Dutchware. These are basically innovative ideas that solve the problems of setting up a tarp, hammock, ridgeline etc. The guy who has more or less come up with these ideas is an experienced traveller and decided to design minimalist hiking gear tackling the issues we have talked about earlier in the post.

I became fascinated with these products and was really impressed with the simplicity of the way they worked. This guy has put a lot of thought into these products and I advise you to check them out as they are very good. To learn more about Dutchware visit their website.

However, having limited funds and the challenge of another DIY project, I decided that I would try and make my own version.

And so, I came up with the SPOOKSTA-RP1

Why the SPOOKSTA... well when I first designed it and cut the thing out, I dropped it on the floor and when I went to pick it up it landed as you see it in the photo. And it just reminded me of a spooky face and for whatever reason "oooh Spooksta !" was the first thing that came into my head.

The Spooksta basically works on the same principal as the Dutchware Tarp Flyz, but isn't made of titanium and costs a lot less... Much Less !!!

The SPOOKSTA-RP1 is the first version I came up with and as you will see from my video demo works relatively well. I incorporated the Spooksta with a similar hook (though much simpler in design) that creates the completed no knot ridgeline system.


The beauty of this system is that it creates a void area by each tree suspension point, which allows your chosen hammock suspension to hang freely between the ridgeline setup, avoiding any un-necessary rubbing of hammock suspension and tarp ridgeline, which may in time damage your kit.

This system can also be permanently attached to your tarp and stored in a "snake skin" or stuff bag, ready for when you need to setup your tarp.


I have no intention of producing the SPOOKSTA-RP1 on a commercial basis as I feel it is too similar to the Dutchware system,plus if you can afford it, you may as well go for Dutch's products as I do believe they are a great range of products.

I hope you have enjoyed this post on my DIY No Knot Tarp Ridgline System. And if it has inspired you to have a go at creating your own, please let me know, as I would be interested to hear your view on the subject.

P.S... Halloween is just around the corner, so beware of the SPOOKSTA !!!!! Ooooohhhhh !!!!!


Sunday 26 August 2012

The Jacklore Handmade Bushcraft Knife

The Jacklore Is A Handmade Bushcraft Knife, Produced In The UK, That Has Recently Appeared And Is Taking The Bushcraft Community By Storm...


In this post we take a look at the British made bushcraft knife that everyone is talking about, the guy behind the handcrafted knife and why it performs so well no matter what type of bushcrafting task you ask the Jacklore to take on.

Experience English Craftsmanship


About three years ago...
A guy called Sandy appeared on Youtube (Youtube Channel G0VQW), producing videos about one of his passions, which was amateur radio.

Then, a year later...
Sandy started adding a couple of videos relating to the outdoors, camping equipment and eventually nights out under canvas or in a hammock.

These outdoor videos, then started to become more frequent and the Bushcraft community were starting to take notice. Sandy (Or Bivouac Jack as he was now calling himself) would take an interest in a bushcraft skill, like the bowdrill, master the technique, then produce more videos on how to perfect the skill, so that other bushcrafters could benefit from the mistakes he made and how he overcame them.

Approximately three months ago...
Sandy published a video on a homemade bushcraft knife that he had produced in his garage at home. This was to become the start of the now well known and sort after Jacklore. In those three short months Sandy (And the Jacklore) have come a long way, to the point where he is now producing some fantastic handmade bushcraft knives that are being dispatched all over the world.

As more and more people are becoming aware of the Jacklore and how good they are, Sandy is receiving all manner of materials in the post for making the knife handle scales, to be fitted to the ever increasing number of Jacklore orders, that Sandy is getting on a daily basis.

Due to the interest and demand for the Jacklore a dedicated website was setup, which is still in its early stages and continually being updated (as and when Sandy gets any spare moments in his busy schedule). A seperate youtube channel has also been introduced, again dedicated solely to the Jacklore knife.


I was lucky enough to receive one of the earlier models of Jacklore. And the knife even in just a month or so, has come even further, in the way it looks, the finish quality and the addition of an optional hand stitched leather sheath.

For me a bushcraft knife is a working knife and should be up to performing any bushcraft related task, such as striking a ferro rod, feather sticking, hearth board preparation (starting the drill hole with the point of your knife) and carving.

The Jacklore is proficient in all of these tasks, but also withstands tougher challenges such as battening and chopping. And after all this punishment can still keep its edge and shave the hairs from your arm.


This is due to the quality of the blade and the way it has been carefully heat treated, giving the blade a Rockwell hardness of approximately 59. The blade and tang (all one piece) are made from 4mm 01 tool steel, with a 22 degree Scandinavian bevel.

Each Jacklore knife is based on the same design (more or less), but when complete the Jacklore is very much an individual knife, especially if the customer has requested their own specific material for the handle scales.

Non more so in my case, as I requested that the scales were made from a piece of mahogany that came from an old 1954 ex-admiralty boat that I used to own for many years. I sent Sandy the piece of mahogany and he used this wood in the making of my Jacklore, giving it a very personal touch (for me anyway). I will now always carry the memories of my time on that boat whenever I carry my Jacklore knife.

Sandy has now produced many Jacklore knives and they are improving in quality each time. Performance wise they are exceptional and looks wise... Well you make up your own mind ! This is my own personal Jacklore knife and one of the early models.


If you would like to learn more about the Jacklore bushcraft knife, watch other independent reviews and see how the Jacklore has evolved, please visit their website www.Jacklore.com

Sunday 3 June 2012

Check Your Firesteel - Is The Fire Steel Striker Any Good ?

We often read in Bushcraft Forums, "What Is The Best....." and fire steels are no exception. So what is the best fire steel ?


Any bushcrafter worth his salt carries some form of firestarter, usually in the form of a ferrocerium rod (Or ferro rod) and striker, but which is the best one to use.

I recently uploaded a video to my Youtube channel - JesterBushcraft, looking at the different firesteels that I personally own and how they differ in quality, compared to price.

Whilst shooting this video I made a little discovery, regarding one of my firesteels in particular. It was a Magfire firesteel that I picked up on the well known auction site, for very little money. But having used it, found the spark to be... well, rubbish to be quite honest !

But during the making of the video, I decided to try a different striker with the Magfire and produced some dramatic differences in its performance. Now call me naive, but it had never even crossed my mind that it would be the striker that was at fault. I just assumed it was the quality of the ferro rod.

Consequently the Magfire was thrown in the bottom of a box, only to be used as a last resort should my other firesteels (Light My Fire & Firestarter) ever get lost or break.

But in a dramatic turn around the Magfire has now taken pride of place in a new firestarting kit I have put together, which includes a cheap multitool. The multitool has a saw blade with a great square edge on it and works brilliantly as a striker for my Magfire firesteel, producing a much MUCH larger spark.

The photo (left) demonstrates the type of spark you should be getting from your ferro rod.


So, I have learnt a number of valuable lessons here :

1. Don't assume that your kit is faulty or works badly... It may just be a small aspect of the kit that is inadequate. Change the weak link and you may well end up with a great piece of kit.

2. Always test your kit before taking it out into the field. If it isnt satisfactory, change it, modify it, so it works how you would expect it to work.

So when asked the question "What is the best firesteel" ? I would always say, that the firesteel is only as good as the striker used to create the spark.


Bushcraft is all about getting out there and trying new skills, learning from your mistakes and discovering new (more efficient) ways of surviving the great outdoors.

Thank you for your continued support and please do comment or add any advice you may have.

Wednesday 30 May 2012

New Section Added To My Blog - Personal Gear & Recommended Kit

I have just added a new section to my blog, which basically highlights the kit I like to use and my reasons for chosing them.


I am always being asked, "What kind of stove do you use ?" or "What is your favourite knife to carry when out on the trail ?", so I decided to add this new page, so people can see exactly what I carry and why.

As I say it is a relatively new page, so it is still being populated... So bare with me.

I have included photos, descriptions and associated videos, demonstrating the kit out in the field.

If you are looking to purchase any of this kit, I have also listed my kit recommendations and where you can purchase them from.

You can view this new page My Personal Gear & Kit Recommendations - HERE or simply use the navigation bar on the right hand side.

Tuesday 29 May 2012

How To Make A Bushcraft Bucksaw

Knowing You Can Make A Bushcraft Bucksaw (If Required) When Out In The Woods Is A Great Skill To Learn, So I Thought I Would Give It A Try...


I have recently noticed an increase in the amount of videos regular Youtube Bushcrafters are uploading, regarding the making of bucksaws.

Some people are using materials they have found in there garage, like planed wood. And other people are using materials sourced from their local woodland. Either way, being able to make your own bucksaw is a great skill to learn and once mastered will stay with you for ever more, ready for when you need to rely on it.

I decided that I would like to have a go, but had already set myself a set of targets before I'd even started.

I was keen to use natural materials, sourced from the woodland. My reasons for this are simple. I want to be able to create a bucksaw when ever I am out in the woods and not have to carry a pre-constructed version in my rucksac (which takes up additional weight and space).


I already have a good sized folding saw, which I could carry in my pack and I also have the Victorinox Trailmaster (Trekker), which I carry with me at all times when out in the field.

Which brings me onto my second target for this task.

I also want to be able to construct this bucksaw (using natural materials) using only the tools I would normally carry on my person or in my pack. And for me, it is my trusty Victorinox.


If I can make a bucksaw using just these 2 items, then I can rest assured that I will always have the skills to knock one up whenever I need the use of a larger sawing tool. Whether it be for making a large shelter or firewood.

Yes, I would always need to have the bucksaw blade with me in my pack, but it takes up little space and can be easily slid down the side of a rucksack or concealed in the backrest padding etc. And of course I would also need to carry 2 bolts/wingnuts too, but again takes up no room at all and weighs next to nothing.

So with my criteria set, I went off into the woods to source my bucksaw materials...


As you can see from the video, I was able to create the bucksaw using just my Victorinox. Ok, some aspects took a little bit of time and effort (Like boring the holes for the bolts), but if push came to shove and I was in a situation where I needed a large saw... I could achieve it !


I think it is good practice to always try and use the tools you would normally carry with you, to achieve these results. As you never know when you may be faced with these situations. And if you know that your skill set will allow you to overcome these obstacles, you will be prepared for anything.

I hope this post has been usefull and that you enjoyed reading (And watching) it... Thanks Again !

Friday 20 April 2012

Going To The Toilet In The Woods


We all do it at home and when we're out on the trail we find ourselves needing to do it, when we would rather not. But going to the toilet in the woods is something, at some point you are going to need to do.

It's not really a subject you hear talked about on bushcraft forums, but I feel it's something we should be aware of. And hopefully if you haven't yet needed to learn about what is involved or required, this post will be of use to you.

"I know have an image of somebody, in a woodland, cross legged, hastily reading this post on their iphone..."

Anyway, lets get down to business (Sorry !... I'm sure there will be more comments like that to follow)

Toilet Kit - What To Carry

It's not a piece of kit you are going to need very often, but when you do, you'll be glad you prepared yourself in adavance.

Put yourself together a simple toilet kit, with all the items required for general toilet maintenance :

  1. Pack of tissues (or toilet paper in a plastic ziplock bag)
  2. Lighter
  3. Small folding trowel or spade
  4. Hand cleanser
  5. Small torch (I know, sound silly... But could be very beneficial)
  6. Bag to carry everything in (The kit contents, not the... well, you know !)
Pack of Tissues

I don't think I need to expalin what these are for, just make sure what ever you decided to use in your kit it kept in a waterproof bag for obvious reasons.

Lighter

This is used to burn the tissues once the required maintenance has been carried out. Just keeps everything more hygenic.

Small Folding Trowel

This is used to dig yourself a suitable hole in the chosen ground to receive the necessary.

Hand Cleanser

Used to clean your hands afterwards, again to ensure everything is kept hygenic. You can buy small bottles of this stuff with handy dispenser pumps. Wipes can also be used.

Small Torch

Chances are you will need to go the toilet in the night and you will need to find your way to the chosen site without having to hack your way threw brambles or get lost. Most people have their own torch, but if you have one in your kit, you know its always there.

Bag To Carry Everything In

Just keeps everything together in a handy kit, which can be stored in a rucksack pocket

If you are spending a night or two in the woods, I would advise chosing a suitable spot for your toilet setup prior to anything else you do. This way, you know everything is there ready should you be caught short. You don't want to be digging a hole with your pants round your ankles.

Chose a secluded spot, well away from camp and away from any running water, ponds or lakes.

Ensure the ground you chose is easy to dig into. You don't want to be spending hours excavating rocks and stone.

If there are several people in your camp or you like a bit of comfort, you may want to build yourself a small framework out of branches and paracord. Giving you something to lean or sit on (This post isnt very dignified I know, but needs must). You could also use a... Dare I say it, log to sit on.

If you are just out for the day and the time arises, just find yourself a suitable spot (As above), dig yourself a hole no deeper than 6" and away you go.

The reason you shouldn't dig any deeper than 6" is that all the bacteria, that will assist in the breakdown of your waste, is present in those first 6" of the ground.

Once the operation is complete, carry out the required maintenance, drop the tissue into the hole and burn it using your lighter. Then cover everything up with the soil you have just excavated.


I hope this post has been of some help to some of you and maybe answered some questions you were to embarressed to ask about.

I would normally say, please let me know how you get on, but in this instance... Maybe Not !

The Importance Of Testing New Kit, Ideas And Theories


I think we could all hold our hands up at some point during our bushcrafting learning curve to rushing out with a new piece of kit, an idea or theory. Only to find that we weren't 100% sure how to use it, it wasn't suitable for the job or the idea was just never going to work.

Which is why it is so important to test new kit, before you take it out into the field. There is nothing worse than travelling several miles or hiking onto the moors or into deep woodland, only to find that you don't really know how you should set up your tarp or hammock.

You may be sheltering from driving rain and decide to warm yourself up with a brew, but have left the instructions for your new gas stove at home and don't know how to work it.

These are all things you may encounter, if you haven't tested your kit first. You may think, "I don't need to try this new stove out, I've had one before"... But it may be faulty, even if it's brand new. It has been known for new kit to be faulty and need returning, so test your kit.

And the same goes for new ideas or theories. I think it's great when people post new ideas or videos on Youtube. The amount of new techniques I have picked up for common bushcraft skills is huge and people are always coming up with innovative ideas and theories.

But you can rest assured that these people didn't just think "Oh, Ive got an idea on how to use a bow drill in a slightly different way". They will have tried it out in their back garden first, numerous times. And once they had mastered it, then they would shoot the video, tell the world and use the new skill when next out in the field, knowing it would work.

I, for example had come up with an idea to create a budget water filtration system. It came to me in a flash of inspiration whilst cleaning out my fish tank and I thought Iwas onto a winner.

I collected all the components I needed and excitedly starting putting them together to create my new water filter.

Once complete, I could of thought "Brilliant, my water filtration problems are solved", popped it into my rucksack, ready for my next outing into the hills.

However, I did of course test it first, by going over the road to my local woodland and finding some dirty water to trial it out. I was quietly confident that it would clean the water to some degree, but wasn't sure to what extent.

You can see the results in my video below :


Since submitting this video to my Youtube Channel, I have received several comments on how I could improve the filter. I'll be honest, I was a little surprised at the level of interest in this video and I now feel I must go back to the drawing board and improve on my design.

For something as important as water filtration, I doubt anyone would trust a homemade device and not test it before going out into the field, but the concept should always be adhered to for any new kit, ideas or theories.

Make a point of familiarising yourself with any new kit you purchase. Enjoy trying it out in the comfort of your garden. Not only will you be getting familiar with how best to setup or use the new kit, it will also increase the efficiency on how quick you can setup your stove or tarp etc. in harsh conditions.

When its chucking it down with rain and blowing a gail, the last thing you want to be doing is reading through soggy instruction manuals.

So, Enjoy your new kit, make sure you familiarise yourself with it and trial any new ideas or theories, before using them out in the field.

Friday 16 March 2012

Learn How To Make A Tent Peg - Video Tutorial

Discover How Easy You Can Learn A New Bushcraft Skill That Will Assist You When Setting Up A Tarp Or Basha.


For me, Bushcraft is all about acquiring new skills, that once mastered will stay with you for evermore and hopefully you will be able to pass on to your kids, students or other people showing an interest in this rewarding activity, we call Bushcraft.

One of the easiest and most rewarding skills to learn is a simple whittling project, that involves making your own tent peg.


For this, any decent pocket knife, such as a Victorinox Trailmaster (Trekker) or a more substantial knife like a Mora Clipper, is all you need to create your peg (Along with a suitable stick of course).

So to begin with, we need to find a suitable stick and I tend to go for one about the tickness of my thumb. This is of course personal preference, but I find this is a decent size to whittle, whilst being strong enough to serve its purpose as a peg (Holding your tarp up).


At the end of this post I will submit a video tutorial, which demonstrates me creating a tent peg. But I just wanted to give a brief written explanation first.


1. Ideally your finished peg needs to be approx 20cm in length (Approx 1 Hand Span, if you don't have a tape measure in your rucksack), so chose a suitable stick with this in mind. A peg that is too short will not hold any reasonable load.

2. Starting approx 1.5" down from the top end of the peg, we make a "X" cut, reasonably deep. Make a kind of rolling action with your blade around the stick as you press down. Don't worry if the "X" cut seems too shallow, we can come back to this as we progress.


3. We then use a push cut, which involves holding the knife with your right hand, but pushing the blade with your left thumb, into each axis of the "X", forming the notch. Try to create a curved cut in to the notch (See diagram below)


4. After each couple of push cuts, perform another downward cross cut, cleaning out the notch.


5. Continue with these 2 cuts (Downward Cross Cut & Push Cut) until you are happy with the depth and look of the notch.

6. Complete the peg by adding a good point, then rounding off the other end to remove any sharp bits that may be uncomfortable, when pushing the peg into the ground with your hand. You can of course use the back of an axe or hatchet to knock the peg into the ground.


Once you have practiced this a few times, you should be able to knock a peg up in under a minute (But Hey...whats the rush...enjoy your whittling)

Friday 9 March 2012

Homemade Bushcraft Hobo Stove & Pop Can Stove

Learn How Easy You Can Put Together A Cheap Homemade Cookset With A Bean Tin And A Pop (Soda) Can.

A Popular Piece Of Kit With Bushcrafters Is The Hobo Stove, Which Is Cheap To Make And Coupled With A Homemade Pop Can Stove, Provides A Great Cookset When Out On  The Trail.


Having all the best gear is great if you can afford it, but not everybody has a disposable income to throw at bushcraft kit (Me included), so why not use what you already have around the house and create your own homemade cookset.

When you are out on the trail, you always need to be able to heat up some water for a brew or cook some noodles etc. And for this you are going to need some form of stove.
Having a few fuel options for your stove is also an advantage and being able to use either meths/alcohol or simply sticks and twigs means you can always get the kettle on.

There are many stoves out there that do a great job, but we are not going to discuss these today. We are going to learn how you can create a versatile, cheap and compact cookset using old bean tins and pop (soda) cans.

I don'y know about you, but there is something satisfying about making something yourself, then going out into the woodland and testing it out for the first time. And its even better when the thing you have created, works great and does everything you wanted it to.

The Hobo Stove

We will start with something we call a Hobo Stove. And as the name suggests, these were (And probably still are) made by hobo's (tramps), out of old tin cans etc. so they could create a contained fire to keep warm, cook food or heat water.


It is, just a tin can, with some holes cut into it. You then load your tin can stove with fuel, such as tinder, kindling, sticks, twigs etc. Ignite the tinder with your firesteel or matches etc. and away you go. You have yourself a small contained heat source, which you can keep going by adding more sticks or twigs.

This is great when you want to make a brew or heat up some food. You just have a quick search round for your fuel, chuck it all in your bushcraft hobo stove and in a few minutes you have heat, which is both a means of heating your water/food etc. and a huge moral booster.


As a wood burner, the hobo stove is excellent and you know you are always going to have a source of fuel around you (most of the time).

Pop Can Stove

Now as a backup or alternative to the wood burner, you can make yourself a "Trangia" style alcohol (meths) burner out of an old pop (soda) can. These are very easy to make (There are endless videos on youtube on how to do this) and work really well.

Homemade alcohol stoves weigh next to nothing and if you damage it, just make another one. The only downside to the pop can stove is that it will not keep excess fuel (meths/alcohol) in it, once you have finished heating your water and extinguished the flame. You have to work out (By experience) how much fuel you are likely to need for the job in hand. Then once you are done, just let the excess burn away until dry.

The pop can stove can be used in conjunction with the hob stove, by simply dropping it in the bottom of the hobo stove, which then acts as a windshield. Your billy can of choice can then sit on top of the hobo stove to heat your water or warm your meal.

Hobo stoves can be adapted to take all manner of billy cans, pans and pots etc. Its just limited by your imagination really.

Depending on what size of bean tin you use, your hobo stove design will work in different ways and allow you to do more or less functions.

You may want a larger bean tin to create a more versatile and robust cooking platform. Or you may want to use the smaller tins to create a lightweight backpacking tin can stove setup.

Whichever you chose (maybe both) you can be pleased with what you have created, knowing you have produced a cheap (if not free) and versatile cooking set, giving you the option to use natural fuel (wood) or alcohol/meths.

Wednesday 7 March 2012

Bushcraft On A Budget - You Don't Have To Spend A Fortune

Learn How You Can Enjoy Bushcraft On A Budget And Avoid Spending A Fortune On All The Must Have Outdoor Kit


When I was a kid playing in the woods, all you needed was a pocket knife and a bit of string. Which allowed me to whittle pieces of wood, slice apples found on our travels and the string meant we could make a bow to play Robin Hood or build a simple shelter (Or den as we called them). And if you were lucky enough to find a match (yes, just one) we had fire too !

Nowadays, with the invention of the trendy word "Bushcraft", it has opened a whole new stream of must have kit, required when venturing any further than the end of your driveway.

Pocket knife, bushcraft knife, spoon carving knife, saw, folding saw, wire saw, hatchet, axe, tarp, poncho, bivi-bag, meths stove, gas stove, solid fuel stove, survival kit, firesteel, gas firelighter, rucksack, backpack, gps,torch, head torch, hammock...

You get the idea...

Getting out into the outdoors, whether it be to observe the wildlife, learn about fungi or foraging, is a great activity to get involved with. And having the appropriate kit to enhance your experience (i.e...Making sure you are comfortable whilst outdoors) is always a sensible aspect to consider.

But purchasing all this kit, can be expensive if you are buying it all brand new. So what I did was to watch several videos on Youtube related to bushcraft, to learn what kit I thought I might require.

Online Auction Site Bargains

And once I had a short list of things to look for, I then went onto the well known auction site and started searching for the kit. But don't just buy the first thing you see. Do your research and watch how much the items are selling for. Before long you will start to get an idea for what certain things are selling for and what you are comfortable paying for.


If you are clever and see when items are finishing on the auction sites, you may be able to snap up some bargains. Some people who list their items for selling are inexperienced and have their items finishing in the middle of the night. These are the items to keep your eye on, as there will be far few people bidding at this time.

Car Boot And Jumble Sales (Yard Sales)

Another place to search for kit is car boot sales and jumble sales. These are a fantastic place to build up your kit, as you have the benefit of being able to physically pick up the item and have a good look at it, before grabbing yourself a bargain... One mans trash is another mans treasure !

Army Surplus Stores

An alternative source of kit, although not quite as cheap, but still good value are Army Surplus Stores. Here you are more often than not guaranteed to be obtaining quality kit, that you know is going to be up to the job and not fall to bits after your first outing. The prices are not as flexible as you are not actually bartering for items. They are simply sold at affordable prices compared to brand new from the traditional high street shops.


However, Are Exceptions...

This doesn't mean to say totally discount the high street stores, as there can be bargains to be had. Just keep your eye out...

Once you have built up some budget bushcraft kit, there is nothing to stop you replacing it with newer kit further down the line (Should you need to of course). Some people just like having the newest kit on the market and that's fine, its your money at the end of the day. But everyone's budgets are different.

I am a great believer in getting good kit for bargain prices and the majority of my kit has been bought from online auction sites. On occasions I have splashed out (No more than £25.00 though... !) and bought a piece of kit I know is of good quality and perfect for what I need. (Again, doing my research first on Youtube)

I will leave you with this short video, which demonstrates what kit you can build up on a tight budget...

What Is The Best Tarp Setup - Steps To Take When Setting Up A Tarp


In this post we are going to look at different methods of tarp set up and steps to follow when setting up a tarp or basha.


If you have ever watched any of Ray Mears TV programs or DVD's, you will have no doubt seen him putting up a tarp, closely followed by setting up a hammock.

Ray always goes through a set procedure, everytime he is tarp camping and there is good reason for this, which we will discuss later on in the post.

But to start, lets go through what you need for a successful basha tarp setup plus the different options you may want to consider.

You can spend quite a considerable amount of money on a good camping tarp set up, but when you first start out, you can easily put together a functional and affordable kit.

So what components do we need ?

Tarp or Basha
Ridge Line
Guylines
Pegs
Karabiners
Prusik Loops

These are the typical components required to set up a tarp shelter, to protect you from the elements, brew up and watch the wildlife. You can of course erect a perfectly adeqate shelter using just a few of these items, so we will go through each component in turn and discuss some of the options or considerations regarding each.

Tarp or Basha

A Tarp is basically a piece of sheet material, with various securing points to allow you to create a temporary shelter when outdoors. Tarps are also referred to as a Basha (Its more of a military term for a tarp).

Tarp sizes vary, depending on how much you want to spend or for what purpose you require the tarp.

If you are setting up a semi-permenant shelter when camping with a hammock, you would want a larger canopy size (e.g 3 x 3m or bigger), to ensure your hammock is fully protected and maybe have room for other kit or an area to cook under.

However, if you are just out for the day or a couple of hours and need the tarp, just in case it rains and you need to be setting up a tarp shelter quickly. You would be better carrying a smaller one, that fits easily into a small rucksack etc. An ex-army poncho is suited to this and can be bought quite cheaply.

The majority of tarps you can get hold of, will come with some form of securing points.
Whether it be as simple as brass eyeletts in each corner. Or like with the more expensive bashas, you can expect brass eyeletts and webbing loops in each corner, loops along the ridge and also press studs to connect two tarps together to form an even bigger canopy.
Obviously the more securing points you have the more versatile your shelter will be, giving you plenty more options when deciding on your tarp configuration.

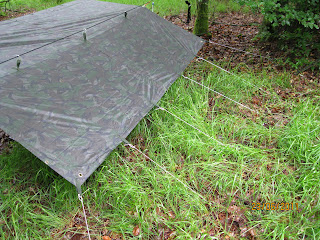
As you can see from the photo on the right, there are several securing points, which has allowed be to peg out the tarp, not just from the corners, but all the way along the bottom edge, giving it more rigidity.

There are also a good amount of webbing loops to secure a good ridge line, again giving me a more rigid shelter, that wont flap around in the wind as much.

When I first started out in bushcraft, I was on a limited budget and as more and more younger people (Who may not be working yet) are getting involved with bushcrafting, you may need to consider the "Cheap Tarps" option.

This is quite acceptable and can be quite rewarding when you put together your own tarp kit for little or no money. One of my first ever videos I filmed for my Youtube Channel (JesterBushcraft) was for just that "A Cheap Tarp Setup"

Ridge Line

Once you have your tarp, you are going to need to secure to one or two trees, depending on what type of configuration you are going for.

The most common way of doing this is by securing some paracord (Which can come in differing sizes) from one tree and attaching the other end to a second tree, wide enough apart to hang your tarp over.

Most people can tie a rope securely to a tree, but the key is to be able to get the knots undone again, when striking camp.

You dont want to be wasting time and energy struggling to undo knots in the rain or the cold.

And for this reason, there are a number of knots or hitches that you can quickly learn, that will allow you to secure a good sturdy ridge line. But more importantly, take it all down again with as little fuss as possible.

Here are a couple of methods I have learnt which I now use all the time when setting up a basha or tarp. You will over time, learn different methods and favour certain ones, as I have mentioned in one of my videos.


There are 2 ways in which you can suspend the tarp from the ridge line. First, you can simply drape the tarp over the ridge line. Or second, you can run the ridge line through the loops on the tarp. Either method is fine. It's all down to personal preference really.

Guylines, Pegs & Karabiners

Once your tarp is suspended from your ridge line, you will then need to secure it using guylines. For this you can use some form of chordage, twine or a narrower guage paracord.
Your guylines need to be long enough to be able to reach down to the ground and also to other securing points, like a tree etc.
I use small karabiners to attach my guylines to the tarp, but you can simply tie them directly onto the webbing loops, if you want to keep them on the tarp permenantly.

I prefer to use karabiners, as it gives me more flexibility when setting up my tarp. I can add and remove guylines where and when I like, without having to mess about undoing any knots.

When pegging out your tarp, you can either carry some normal metal pegs (like from a small tent) or carve some yourself, which is more time consuming. Carving your own pegs, should only be done if you are not pushed for time, but is more rewarding and saves weight in your pack. The hardest thing about carving your own pegs is having to leave them behind (especially when its the first few pegs you have ever made).

Prusik Loops

In the list of components above, we mentioned Prusik Loops. These are a very simple device, but very effective and simple to use. I use Prusik Loops everytime when setting up a tarp as I find it the quickest and most reliable method to secure the tarp to the ridge line. The Prusik Loop is attached onto the ridge line, at either end of the tarp, then secured using a karabiner to one of the end ridge loops, stopping it from sliding up and down the ridge line.

The next video demonstrates each component we have just discussed, including the use of Prusik Loops. And as you will notice in the video, you are learning all the time. the more you get out and test your kit, the more familiar you will get with it.


To conclude, we will go back to the beginning of the post when me mentioned about a set routine. This basically means, get used to setting up your tarp in the same order everytime time you are out. And also when packing your kit away. Even the way you fold your tarp, how you hank your ridge line etc.

Always pack your kit into the same part of your rucksack, so you know exactly where it is, when you have to set up your tarp in a hurry.

Working to this set routine will eventually make the process second nature to you and save you time and effort.

I hope this post was of some use to you (Mainly for newcomers to bushcraft really) and I would like to finish by providing you with a short list of related videos that may also be of added benefit :

Related Videos

1. Desert Basha - A Brief Demo
2. Hanking Guylines (ropes)
3. Tarp & Pole Setup Using A Walking Pole
4. New Tarp Configuration Testing